Picking drone mapping software feels harder than it should be.
Open any review site, and you will see the same ten names repeated: Pix4D, DroneDeploy, DJI Terra, Agisoft Metashape, UgCS. But the recom
What is Drone Photogrammetry?
Drone photogrammetry is a remote sensing technology that uses a series of overlapping aerial images captured by an unmanned aerial vehicle (UAV) to create precise 2D maps, 3D models, and measurements of physical objects or terrain.
Instead of relying on direct contact with the ground, it employs the principles of photogrammetry—the science of extracting geometric information from photographs. By analyzing the same point in multiple images taken from different positions, specialized software can triangulate its exact 3D coordinates, generating a dense point cloud that forms the foundation for all subsequent outputs.
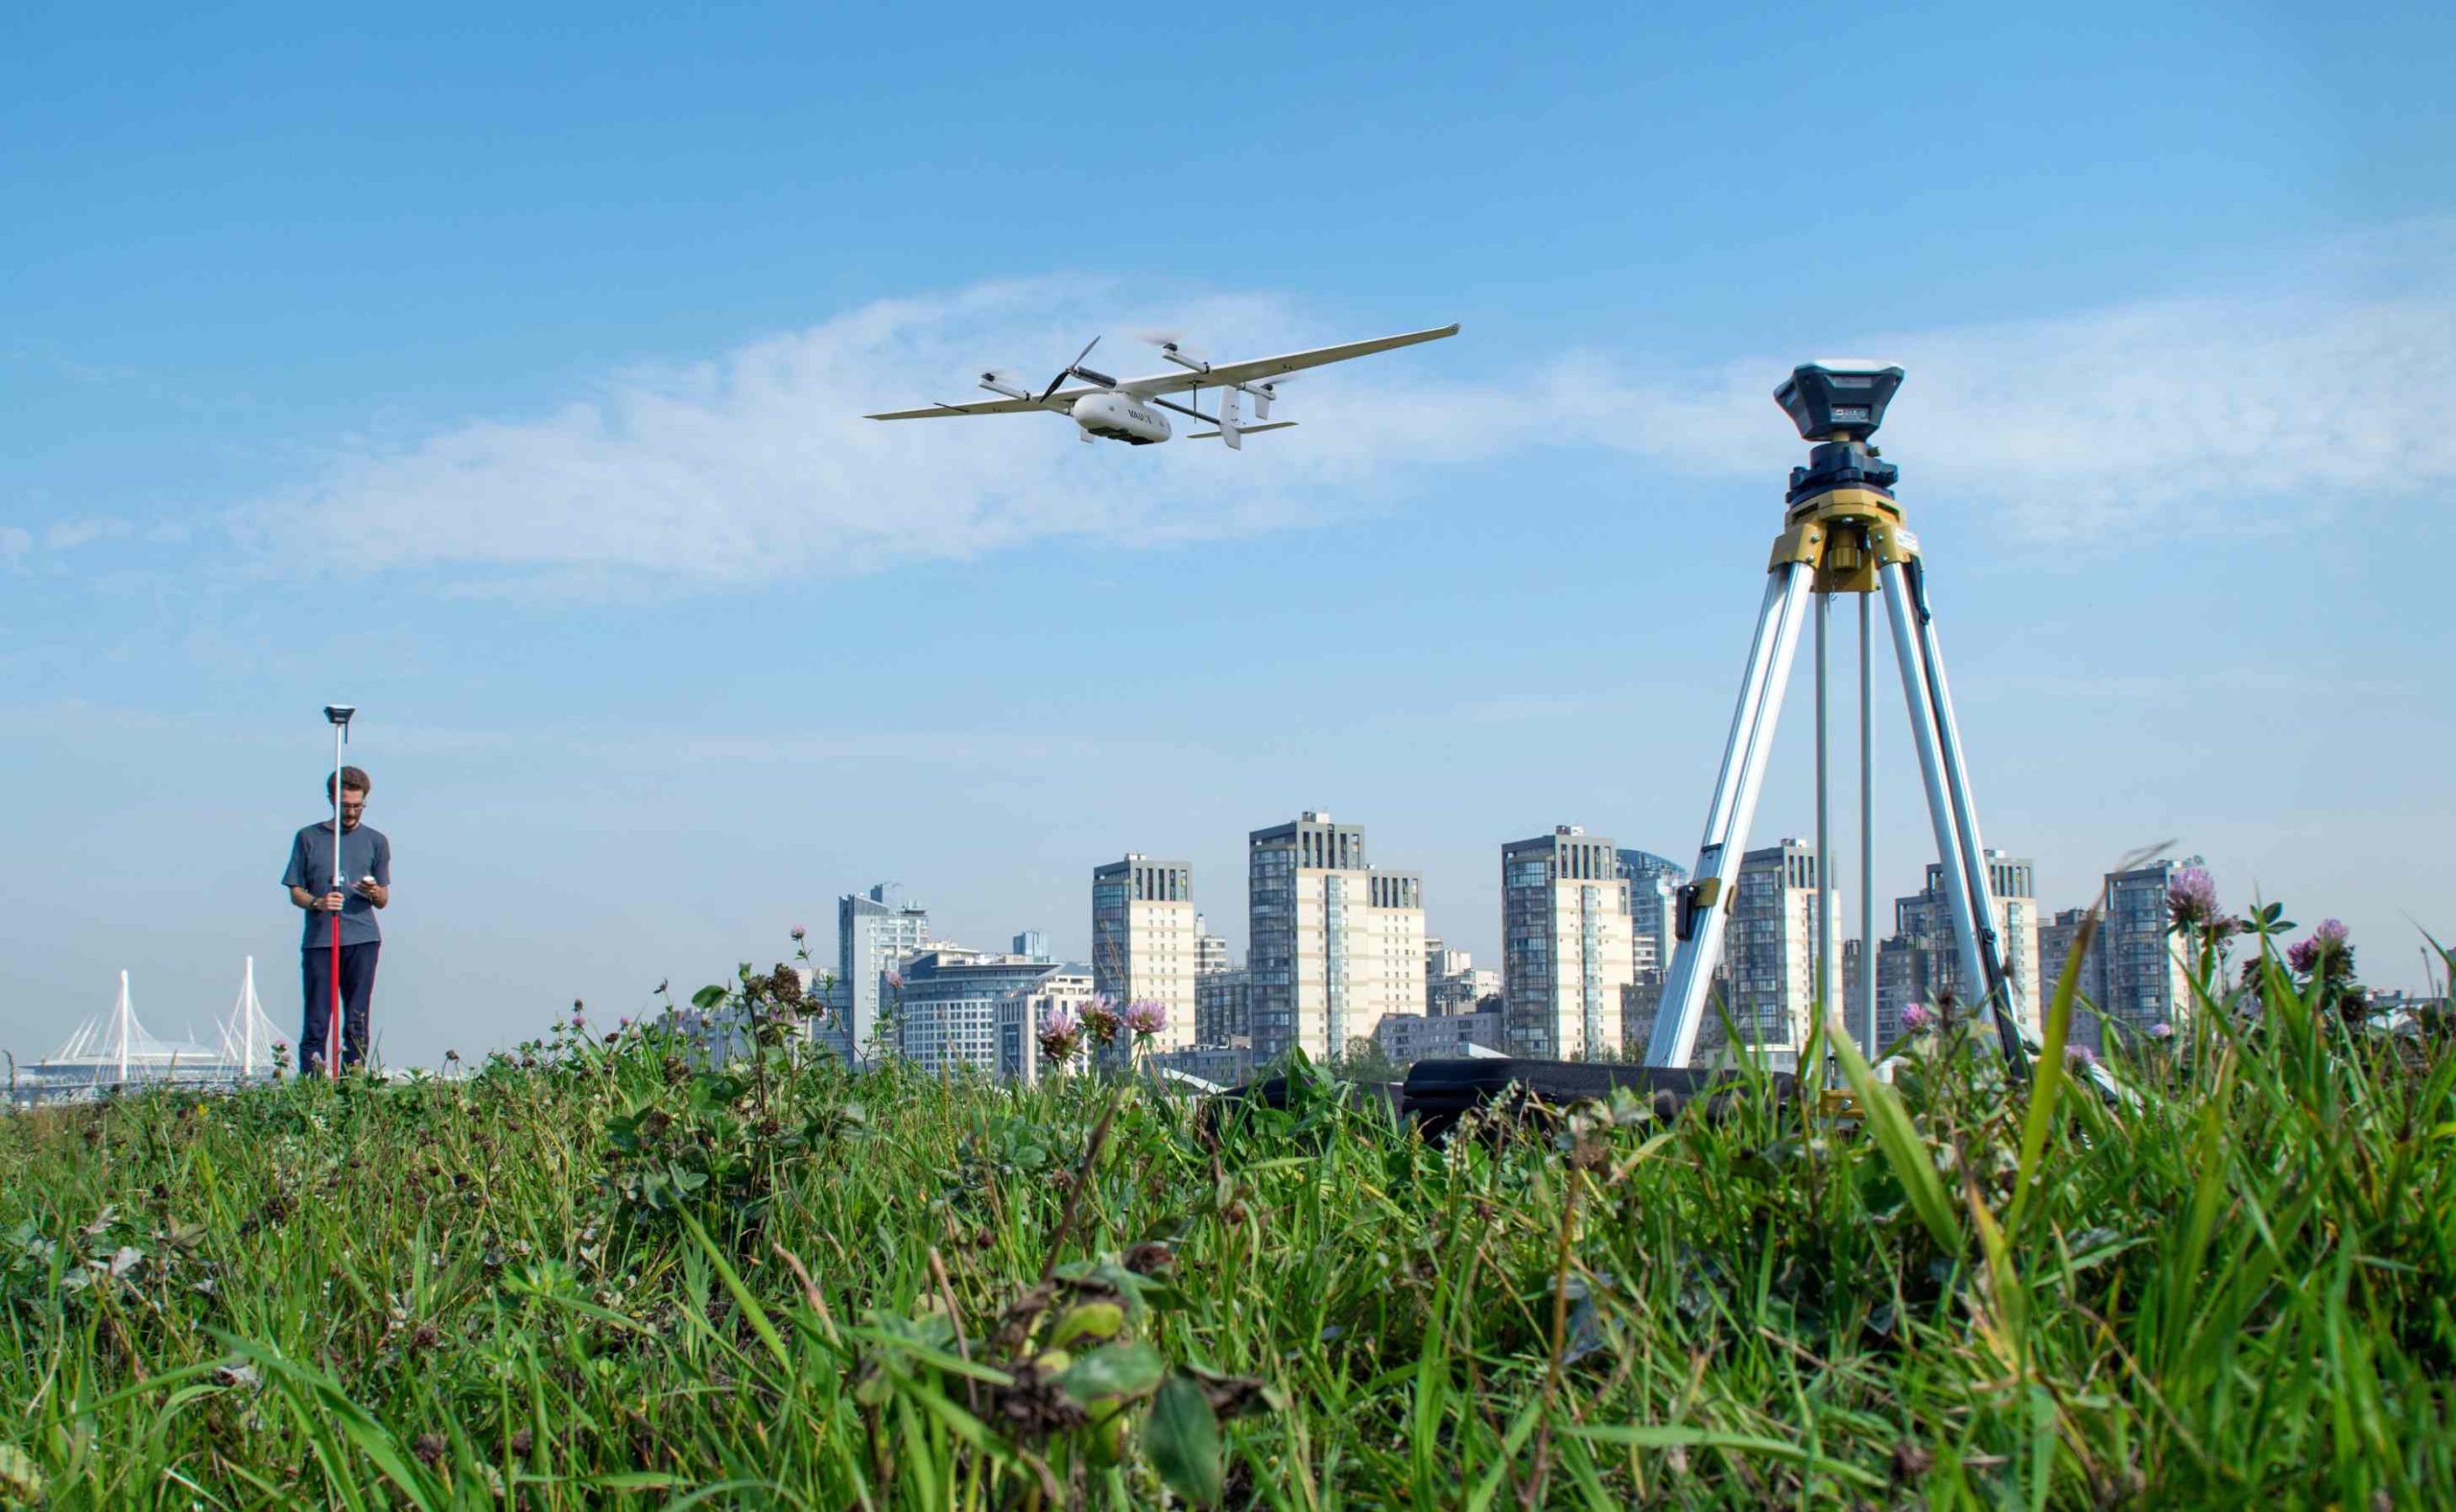
Aerial Photogrammetry vs. Drone Photogrammetry
While often used interchangeably, these terms have a distinct difference:
Aerial photogrammetry is the broader category, traditionally performed using manned aircraft or satellites. It has been used for mapping for over a century.
Drone photogrammetry is a modern subset that replaces crewed aircraft with drones. This shift makes the technology faster, more flexible, significantly cheaper, and capable of capturing much higher-resolution data at lower altitudes.
Drones can access dangerous or difficult-to-reach areas (e.g., cliff faces, mine pits, disaster zones) with minimal risk, making them the preferred platform for most local to regional-scale mapping projects today.
How to Choose the Best Drone for Photogrammetry?
Choosing a drone for photogrammetry is not simply about picking the drone with the highest-resolution camera or the longest flight time. The right platform needs to provide stable image capture, accurate positioning, sufficient coverage, and compatibility with your mapping workflow.
For professional surveying and mapping, pay particular attention to the following factors.
Camera and Sensor
The camera is one of the most important components of a photogrammetry drone. Look for a camera that provides sufficient resolution, good lens quality, and consistent image geometry.
For professional mapping, a large sensor and high-resolution camera can capture more detail and produce lower GSD at a given altitude. A fixed-focus lens with low distortion is also preferable because significant lens distortion can affect image matching and geometric accuracy.
For applications requiring precise reconstruction, camera specifications such as sensor size, resolution, focal length, lens distortion, and dynamic range are generally more important than simply comparing megapixel counts.
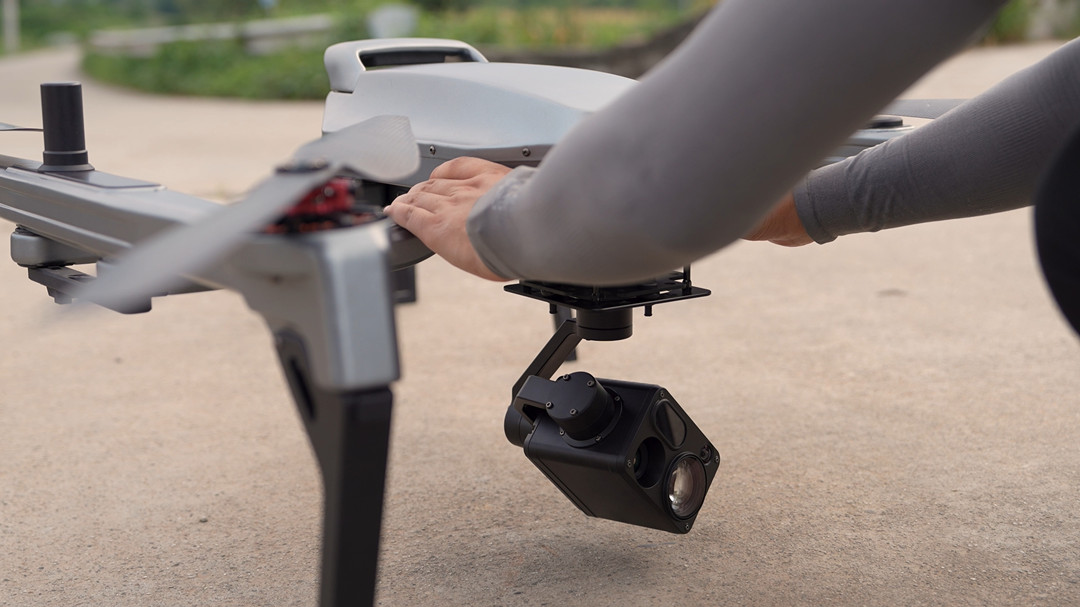
Global Shutter vs. Rolling Shutter
A global shutter captures the entire image at essentially the same moment, minimizing geometric distortion caused by drone movement. This makes global-shutter cameras particularly well suited to aerial mapping.
A rolling shutter captures the image line by line. If the drone or subject moves during exposure, objects can appear slightly distorted, which may reduce photogrammetric accuracy.
For professional surveying and high-accuracy mapping, a global-shutter camera is generally preferred. However, modern photogrammetry software can compensate for some rolling-shutter effects when camera calibration and flight conditions are well controlled.
RTK and PPK Positioning
Accurate camera positioning can significantly improve the georeferencing of drone photogrammetry data.
RTK (Real-Time Kinematic) provides centimeter-level positioning corrections during the flight, while PPK (Post-Processed Kinematic) applies positioning corrections after the flight.
RTK or PPK can reduce the amount of ground control required and improve the absolute positioning of the resulting maps. However, they do not automatically guarantee centimeter-level final accuracy. Camera quality, GSD, image overlap, GCPs, processing settings, and field conditions still matter.
For professional mapping, choose a drone that supports RTK, PPK, or both, especially when accurate georeferencing is required.
Ground Sampling Distance (GSD)
Ground Sampling Distance (GSD) represents the ground area covered by one image pixel. A lower GSD means finer spatial resolution and more detailed mapping data. For example, a GSD of 2 cm/pixel means each pixel represents approximately 2 cm on the ground.
GSD depends on several factors, including:
- Camera sensor and resolution
- Focal length
- Flight altitude
- Image resolution
If your project requires detailed measurements or small feature detection, choose a drone-camera combination capable of achieving the required GSD at a practical flight altitude.
Flight Time and Mapping Coverage
Longer flight time allows a drone to cover more area per mission and reduces the number of battery changes or takeoffs required.
For small construction sites or localized surveys, a compact multirotor may provide sufficient endurance. For large-area mapping, however, a long-endurance fixed-wing or VTOL platform can be more efficient.
When comparing flight time, also consider survey speed, camera trigger interval, flight altitude, terrain, and required image overlap. A drone with a longer advertised flight time does not necessarily provide greater mapping productivity.
Payload Capacity
Payload capacity becomes important when the drone needs to carry a professional mapping camera, LiDAR sensor, or multiple payloads.
A heavier payload can reduce flight endurance, so the aircraft should have sufficient payload capacity without sacrificing the operational efficiency required for the mission.
For photogrammetry-only projects, an integrated camera system can be advantageous because it simplifies payload integration, calibration, and flight planning.
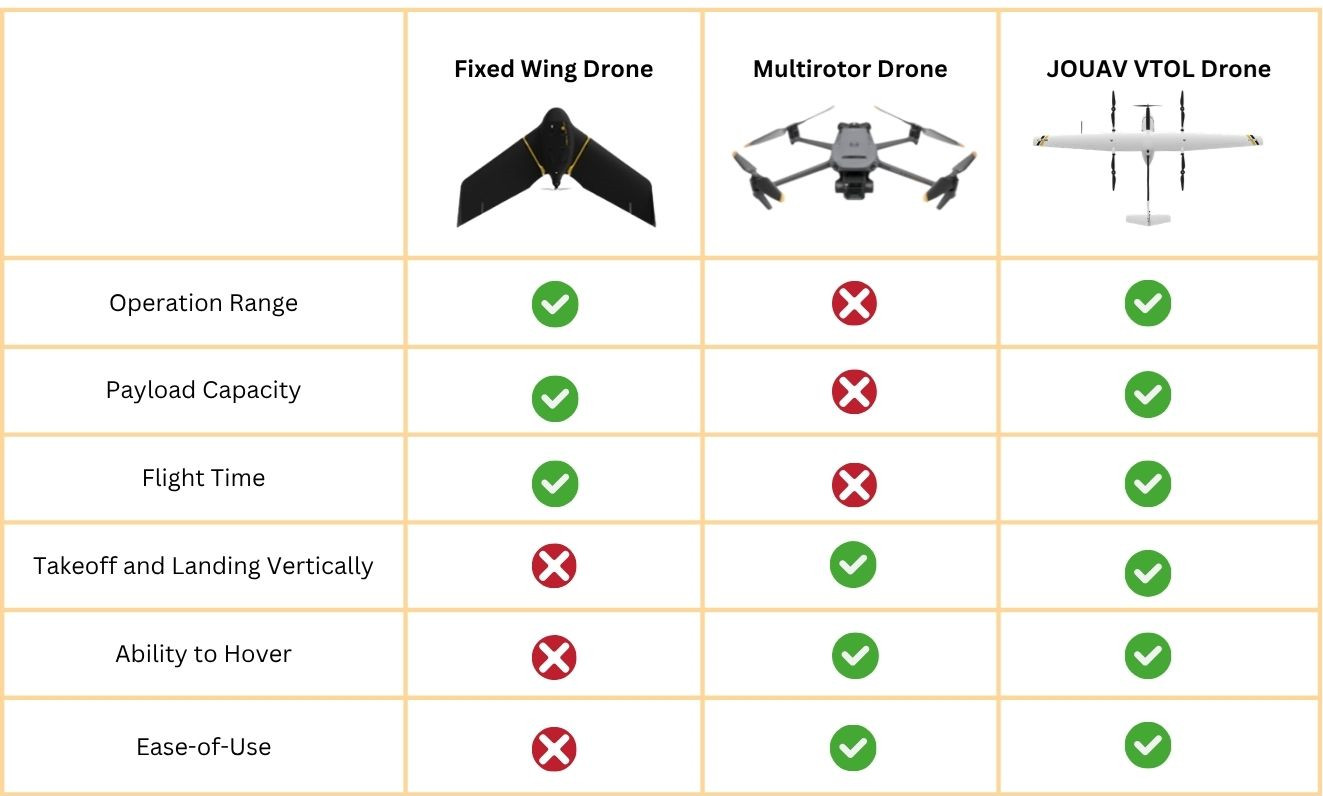
Multirotor vs. Fixed-Wing vs. VTOL
The best drone configuration depends largely on the size and characteristics of the survey area.
Multirotor drones are easy to operate, can take off and land vertically, and can hover precisely. They are well suited to small- and medium-sized mapping projects, construction sites, and complex terrain.
Fixed-wing drones can typically cover much larger areas more efficiently because they generate lift through forward flight. They are suitable for large-scale surveying, corridor mapping, and extensive agricultural or mining sites, but usually require more space or specialized methods for takeoff and landing.
VTOL drones combine the vertical takeoff and landing capability of multirotors with the efficient forward flight of fixed-wing aircraft. This makes them particularly useful for large-area mapping where both operational flexibility and long endurance are important.
Flight Planning and Software Compatibility
A photogrammetry drone should work smoothly with the flight-planning and data-processing software used in your workflow.
Before choosing a platform, check whether it supports essential functions such as:
- Automated grid and corridor missions
- Adjustable flight altitude and speed
- Image overlap and sidelap settings
- Terrain-following flight
- Automated image capture
- RTK/PPK data recording
- Common image and positioning data formats
A technically capable drone is only useful if it can reliably integrate with the rest of your photogrammetry workflow.
Quick Checklist
For professional drone photogrammetry, prioritize:
Camera quality → Global shutter → RTK/PPK → Required GSD → Flight endurance → Mapping coverage → Payload capacity → Flight-planning compatibility
There is no single best photogrammetry drone for every project. The right choice depends on survey area, required accuracy, terrain, mapping resolution, budget, and operational requirements.
How Does Drone Photogrammetry Work?
Drone photogrammetry is not a single step but a systematic process that transforms raw aerial images into accurate 2D maps and 3D models.
Below is a complete 8-step workflow, from project definition to data delivery.
Step 1 — Define the Survey Requirements
Before selecting a drone or planning a flight, determine what the survey needs to deliver.
Start with four basic questions:
- What is the project for? For example, topographic mapping, construction progress monitoring, stockpile measurement, 3D modeling, or inspection.
- What accuracy is required? A construction visualization project may tolerate more error than an engineering or surveying project.
- What area needs to be mapped? The size and shape of the area of interest (AOI) affect flight time, number of images, and the most suitable drone platform.
- What outputs are required? Common deliverables include orthomosaics, point clouds, DSMs, DTMs, contour maps, and 3D models.
These requirements determine almost everything that follows, including the drone, camera, GSD, flight altitude, overlap, positioning method, and processing workflow.
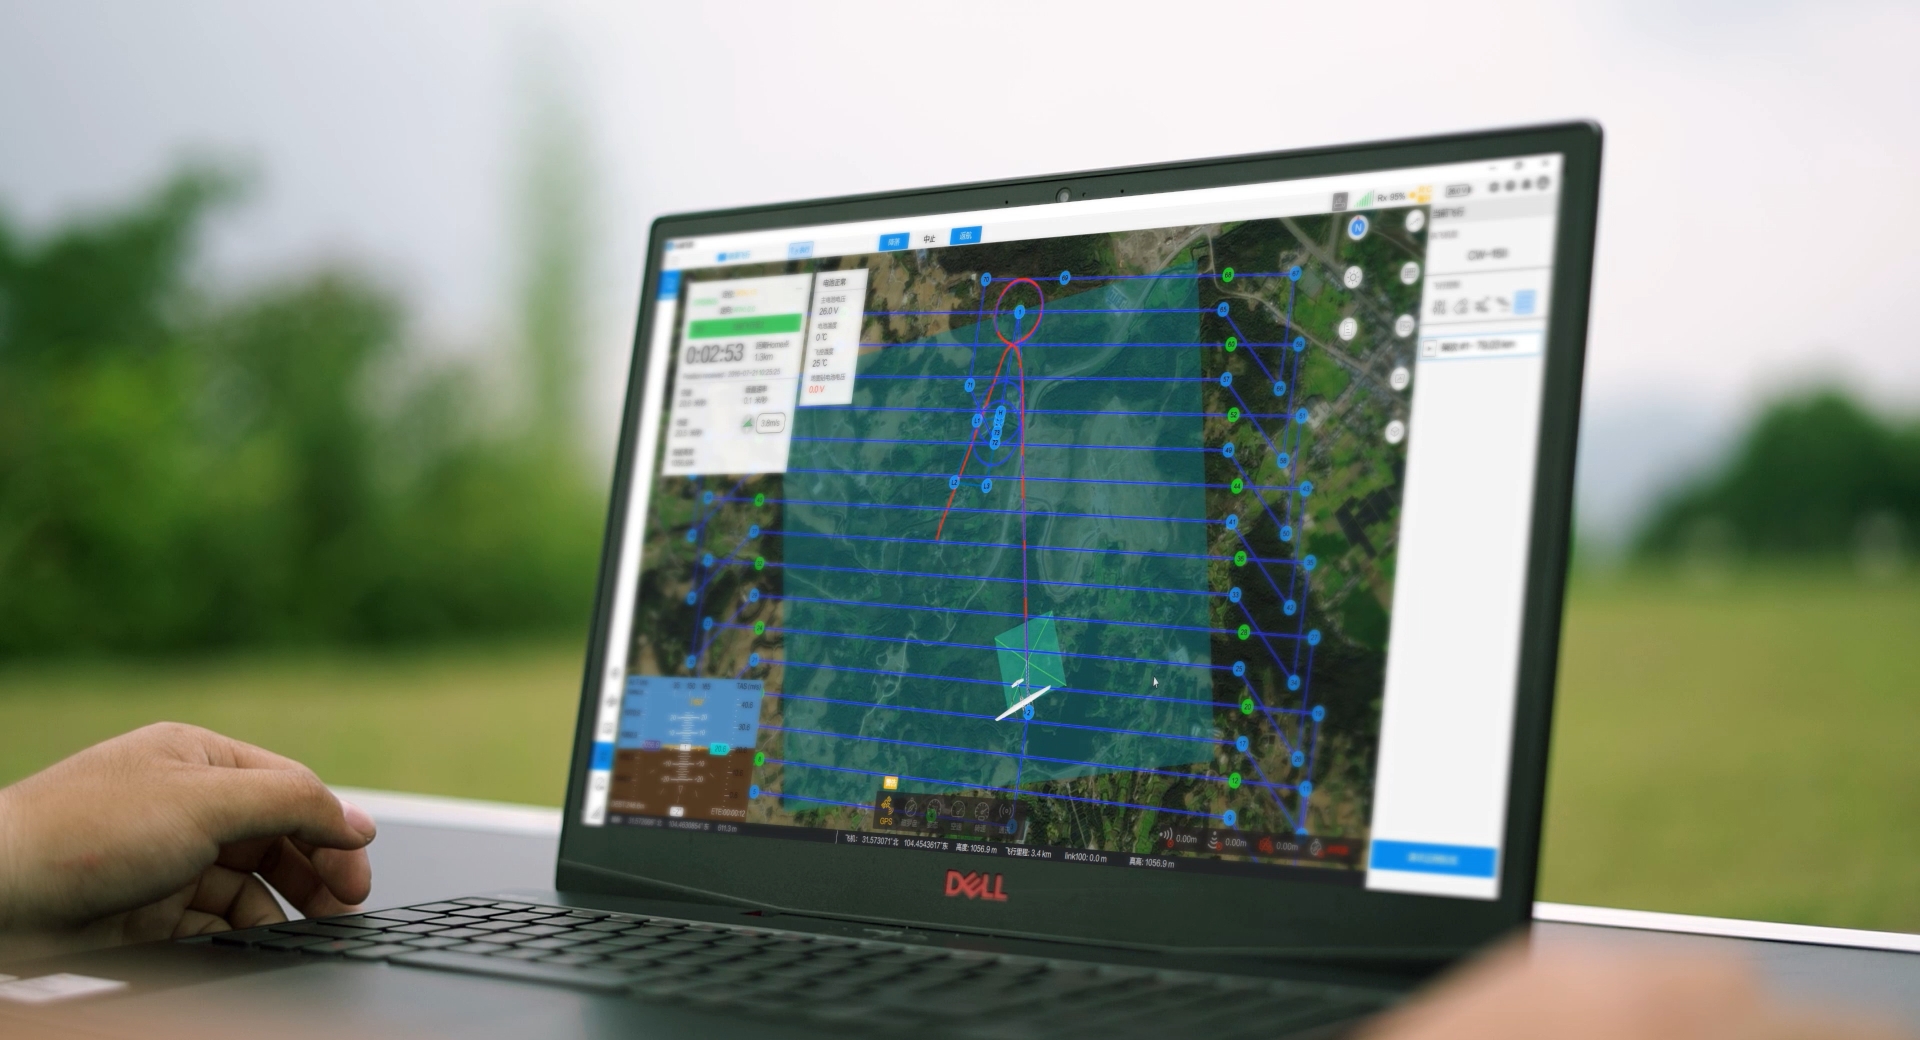
Step 2 — Plan the Flight
Once the requirements are clear, the next step is to design the flight mission using software such as DJI Pilot 2, Pix4D, DroneDeploy, or other compatible mission-planning platforms.
For a standard top-down mapping project, the drone typically follows a parallel grid or “lawnmower” flight pattern, capturing overlapping images as it moves between flight lines. More complex sites may require additional flight patterns.
For example:
- Flat terrain: A standard grid flight is often sufficient.
- Buildings and other vertical structures: Double-grid or oblique imagery can improve the reconstruction of façades and vertical surfaces.
- Terrain with significant elevation changes: Terrain-following flight can help maintain a more consistent GSD.
- Large-area mapping: Fixed-wing or VTOL platforms can cover substantially more ground per flight than small multirotors.
Flight planning should also account for obstacles, restricted airspace, takeoff and landing locations, battery requirements, terrain, and expected weather conditions.
The goal is not simply to cover the site but to collect consistent, sufficiently overlapping imagery with the required ground resolution.
Step 3 — Set GSD, Image Overlap, and Sidelap
Before the mission begins, set the flight parameters that determine how the images will cover the ground.
Ground Sampling Distance (GSD) defines how much ground area is represented by each image pixel. Flying lower generally produces a smaller GSD and more detailed imagery, while flying higher increases coverage but reduces ground resolution.
Image overlap is equally important.
- Front overlap refers to the overlap between consecutive images along the same flight line.
- Sidelap refers to the overlap between images on adjacent flight lines.
For many mapping missions, around 75–80% front overlap and 60–70% sidelap are reasonable starting points. Higher overlap may be appropriate for complex terrain, vegetation, tall structures, or areas with limited visual texture.
More overlap provides more observations of the same features and can improve reconstruction, but it also means more images, larger datasets, and longer processing times.
The right balance depends on the required accuracy, terrain, camera, drone, and project size.
Step 4 — Set Up RTK/PPK and Ground Control
If accurate georeferencing is required, the drone's positioning system becomes an important part of the workflow.
RTK (Real-Time Kinematic) provides positioning corrections during the flight, while PPK (Post-Processed Kinematic) applies corrections after the mission. Both can significantly improve the accuracy of the camera positions recorded for each photograph.
Ground Control Points (GCPs) can also be used. These are clearly identifiable points on the ground whose coordinates have been accurately surveyed.
Depending on the project, you may use:
- Standard GNSS + GCPs for projects where additional ground control is practical.
- RTK/PPK without GCPs for applications where the positioning solution and required accuracy make this approach appropriate.
- RTK/PPK + GCPs or checkpoints for more demanding projects where absolute accuracy needs to be controlled and independently verified.
The important distinction is that GCPs used for processing and independent checkpoints used for validation serve different purposes. Checkpoints provide a way to determine whether the final photogrammetric products actually meet the required accuracy.
Step 5 — Capture the Images
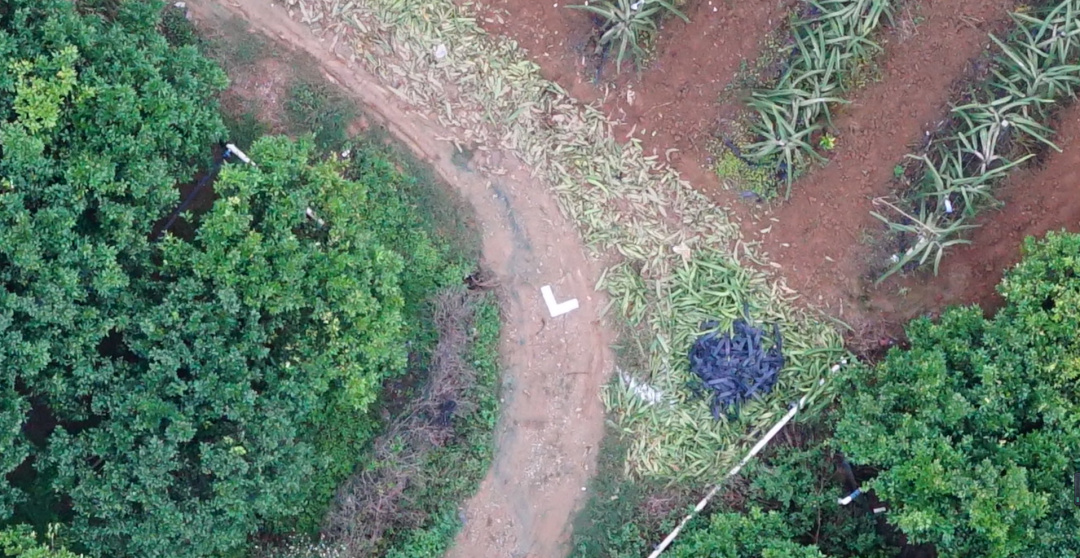
With the mission configured, the drone flies the planned route and captures a series of overlapping photographs.
For mapping missions, automated flight is normally preferred because it maintains a consistent altitude, speed, camera orientation, and image interval. The operator still needs to monitor the aircraft, weather, battery status, positioning solution, and potential obstacles throughout the mission.
Camera settings also matter. Use settings that produce sharp, consistent images across the entire flight. In particular:
- Keep shutter speed fast enough to avoid motion blur.
- Use a suitable ISO to minimize image noise.
- Maintain consistent focus and exposure where possible.
- Avoid flying too quickly for the selected shutter speed and camera.
- Avoid conditions that create excessive glare, shadows, or rapidly changing illumination.
The result is a collection of geotagged aerial images, usually accompanied by GNSS/RTK/PPK positioning information and camera metadata.
Step 6 — Process the Images
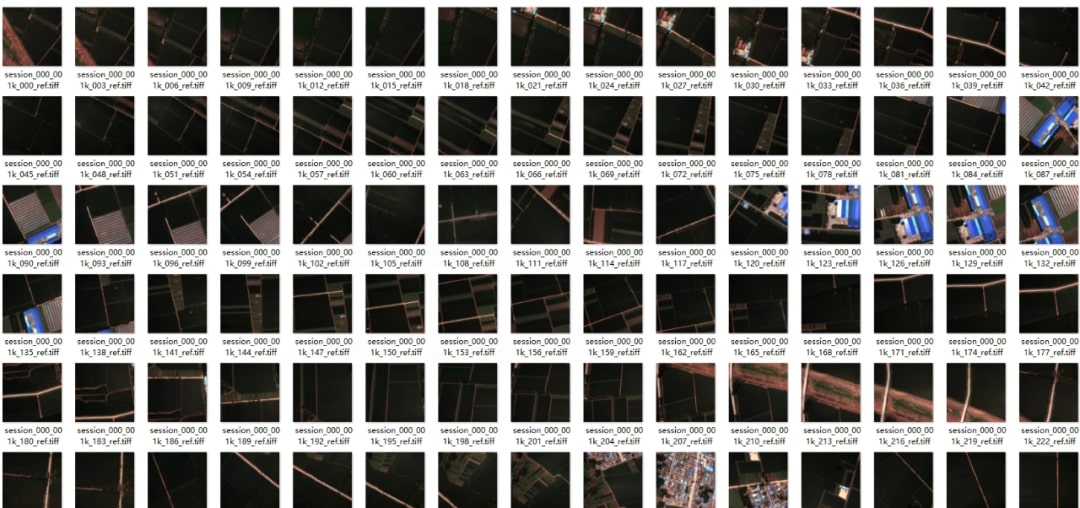
After the flight, the images are imported into photogrammetry software such as Pix4D, Agisoft Metashape, DJI Terra, DroneDeploy, or OpenDroneMap.
This is where hundreds or thousands of 2D photographs are converted into a 3D representation of the surveyed area.
Although the exact workflow varies between software packages, the main stages are:
1. Image quality check
The software and operator identify blurred, overexposed, underexposed, or otherwise unusable images. Removing poor-quality images before processing can prevent problems later.
2. Image alignment and feature matching
The software identifies recognizable features in overlapping photographs and matches them across multiple images. These common features allow the software to determine how the images relate to one another.
3. Camera calibration and bundle adjustment
The software estimates camera parameters and refines camera positions and orientations. This step helps compensate for lens distortion and improves the overall geometric consistency of the image block.
4. Structure from Motion (SfM)
Using the matched features and camera geometry, the software calculates the 3D position of common points and creates an initial sparse point cloud.
5. Dense point-cloud generation
Multi-view stereo (MVS) techniques are then used to generate a much denser 3D point cloud. This becomes the foundation for many of the final mapping products.
6. Georeferencing
RTK/PPK observations, GCPs, and other survey information are incorporated to place the model into the required coordinate system.
The result is a georeferenced 3D dataset that can be used to create maps, terrain models, measurements, and other deliverables.
Step 7 — Generate Photogrammetry Outputs
The processed point cloud and aerial imagery can then be converted into different types of deliverables, depending on the project's needs.
Common outputs include:
- Orthomosaic: A geometrically corrected aerial map that can be used for measurements and site documentation.
- Point cloud: A collection of 3D points representing the surveyed environment.
- DSM: A model of the surface including features such as buildings and vegetation.
- DTM: A terrain model representing the ground surface after removing above-ground features.
- 3D mesh: A textured 3D representation of the surveyed area.
- Contour map: Elevation contours derived from terrain data.
These outputs can be exported in formats such as GeoTIFF, LAS, LAZ, OBJ, DXF, and other GIS/CAD-compatible formats, depending on the software and intended application.
Orthomosaic Maps
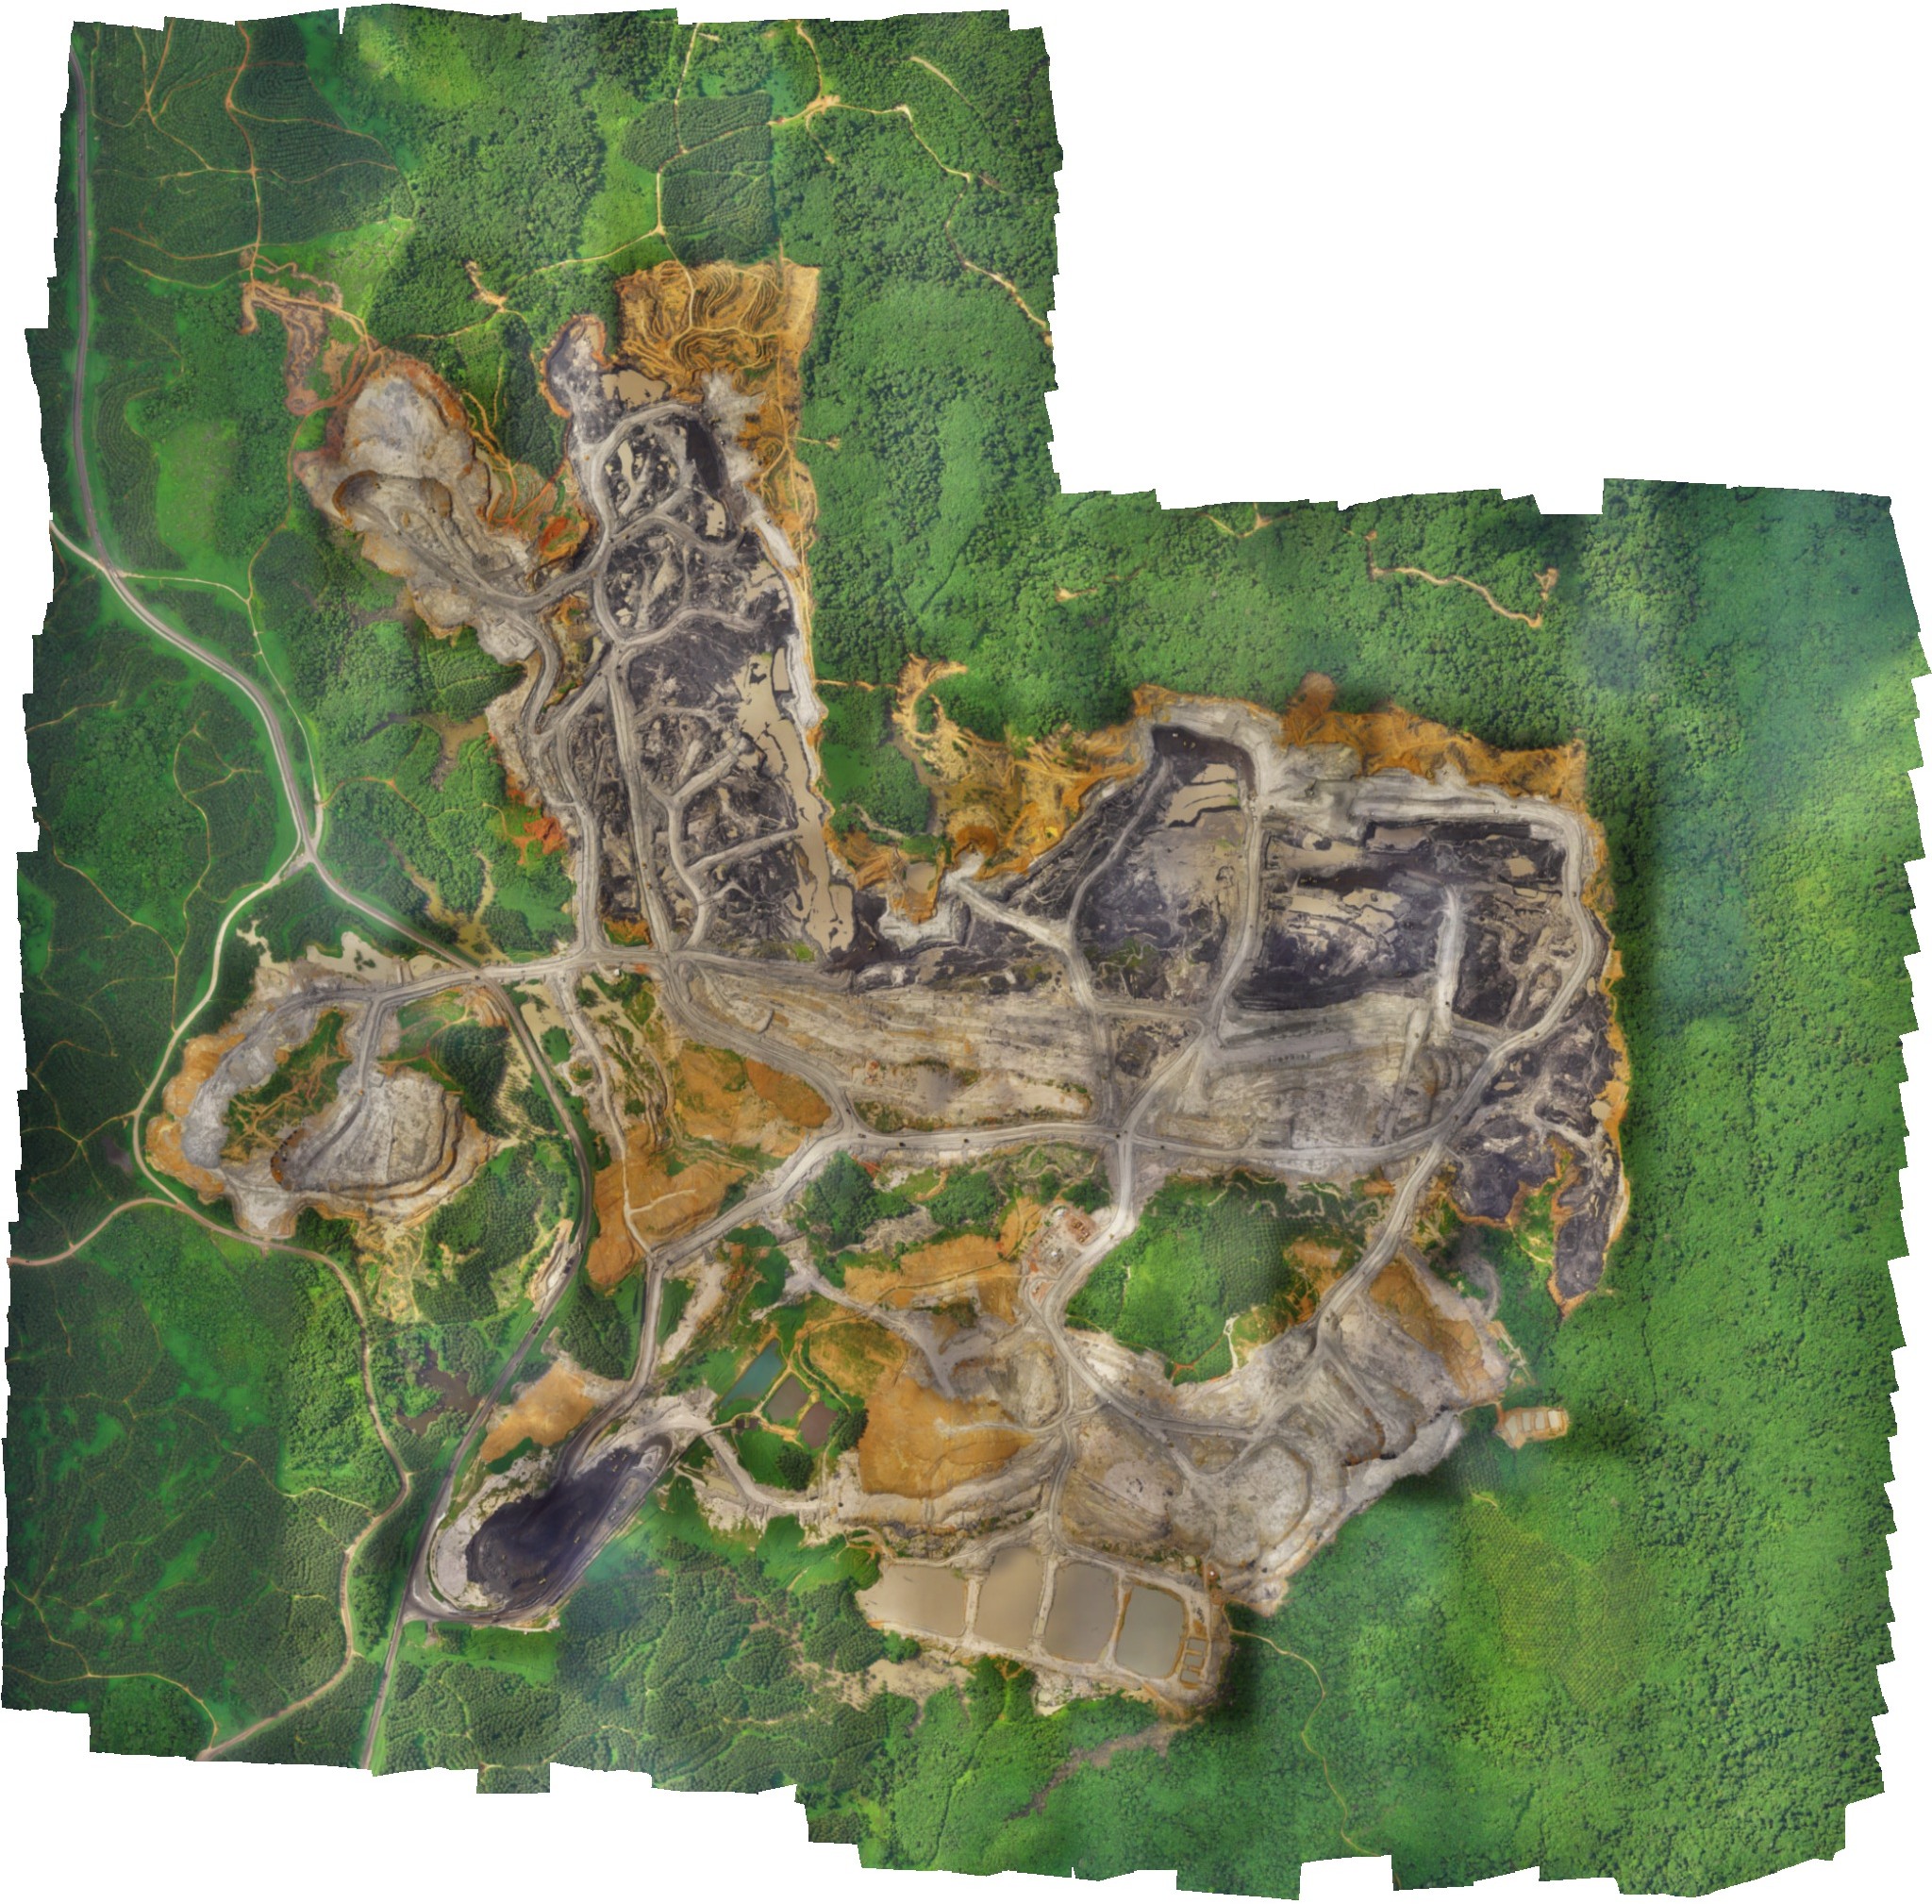
An orthomosaic is a seamless aerial map created by stitching together multiple overlapping images and correcting them for camera perspective and terrain-related distortion.
Unlike a conventional aerial photograph, an orthomosaic is georeferenced and orthorectified, allowing users to measure distances, areas, and other features within the limits of the survey's accuracy.
Orthomosaics are commonly used for:
- Land surveying: Create up-to-date base maps and document land features.
- Construction: Monitor site progress, measure work areas, and compare actual site conditions with plans.
- Agriculture: Map fields, monitor crop areas, and support precision agriculture workflows.
- Mining: Map pits, stockpiles, roads, and other site features.
- Environmental monitoring: Document wetlands, shorelines, vegetation, and changes over time.
For many mapping projects, the orthomosaic is the most immediately useful deliverable because it provides a familiar 2D view of the entire site while retaining geographic reference.
Point Clouds
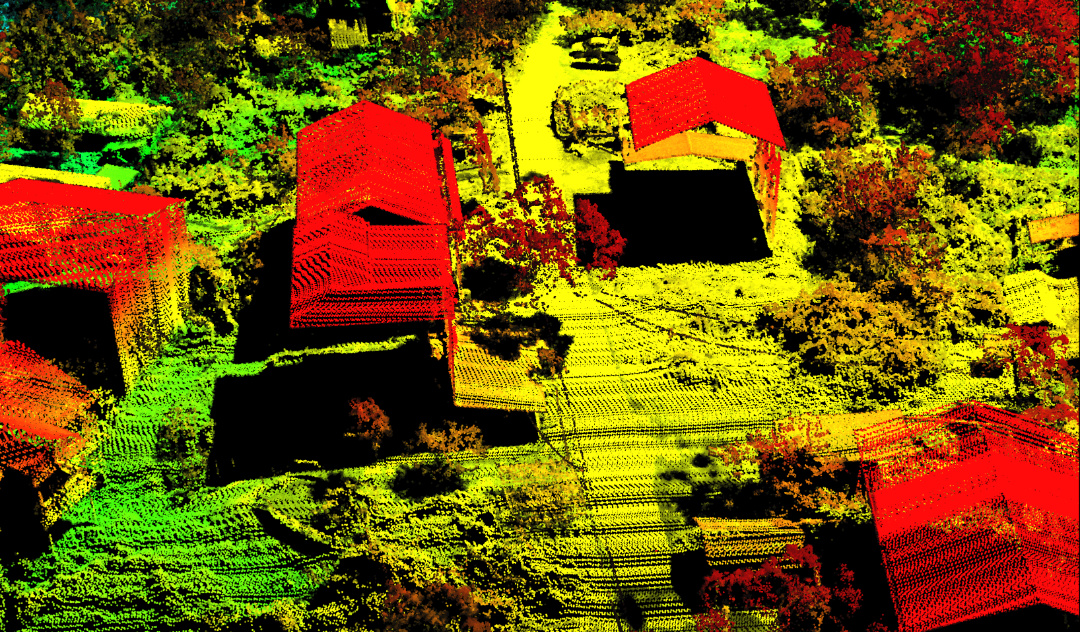
A point cloud is a collection of 3D points representing the surfaces captured by the drone. Each point contains spatial coordinates (X, Y, and Z), and may also contain color or classification information.
Photogrammetry typically produces a sparse point cloud during image alignment and then a much denser point cloud during 3D reconstruction.
Dense point clouds can be used for:
- Stockpile and earthwork volume calculations
- Terrain and elevation analysis
- Construction site documentation
- Infrastructure and asset modeling
- 3D model generation
- Point classification and feature extraction
Points can also be classified into categories such as ground, vegetation, buildings, and other objects, making the dataset more useful for GIS and engineering analysis.
Common formats include LAS, LAZ, PLY, and XYZ.
Digital Surface Models (DSM) and Digital Terrain Models (DTM)
A Digital Surface Model (DSM) represents the elevation of the uppermost surface captured by the survey. This can include bare ground, buildings, trees, vehicles, and other visible features.
A Digital Terrain Model (DTM) focuses on the underlying ground surface, with above-ground features filtered out where the data and processing workflow allow.
This distinction makes the two models useful for different applications:
DSM
- Building and structure analysis
- Vegetation and canopy analysis
- Urban planning
- Surface modeling
- Solar and visibility studies
DTM
- Topographic surveying
- Road and infrastructure design
- Drainage and watershed analysis
- Cut-and-fill calculations
- Terrain and slope analysis
A DTM can also be used to generate contour lines and other elevation-based products.
Both DSMs and DTMs are commonly exported as GeoTIFF or other GIS-compatible raster formats.
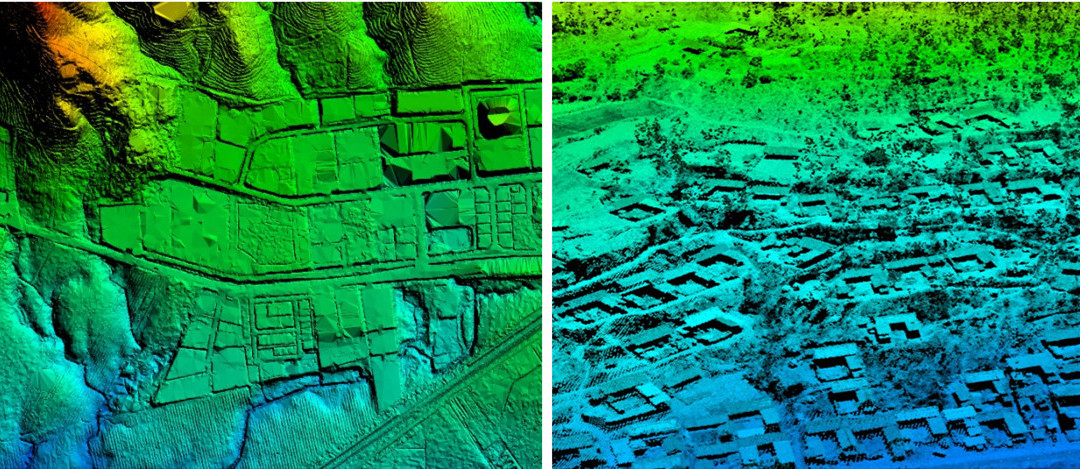
DSM vs. DTM
3D Models and 3D Terrain Models
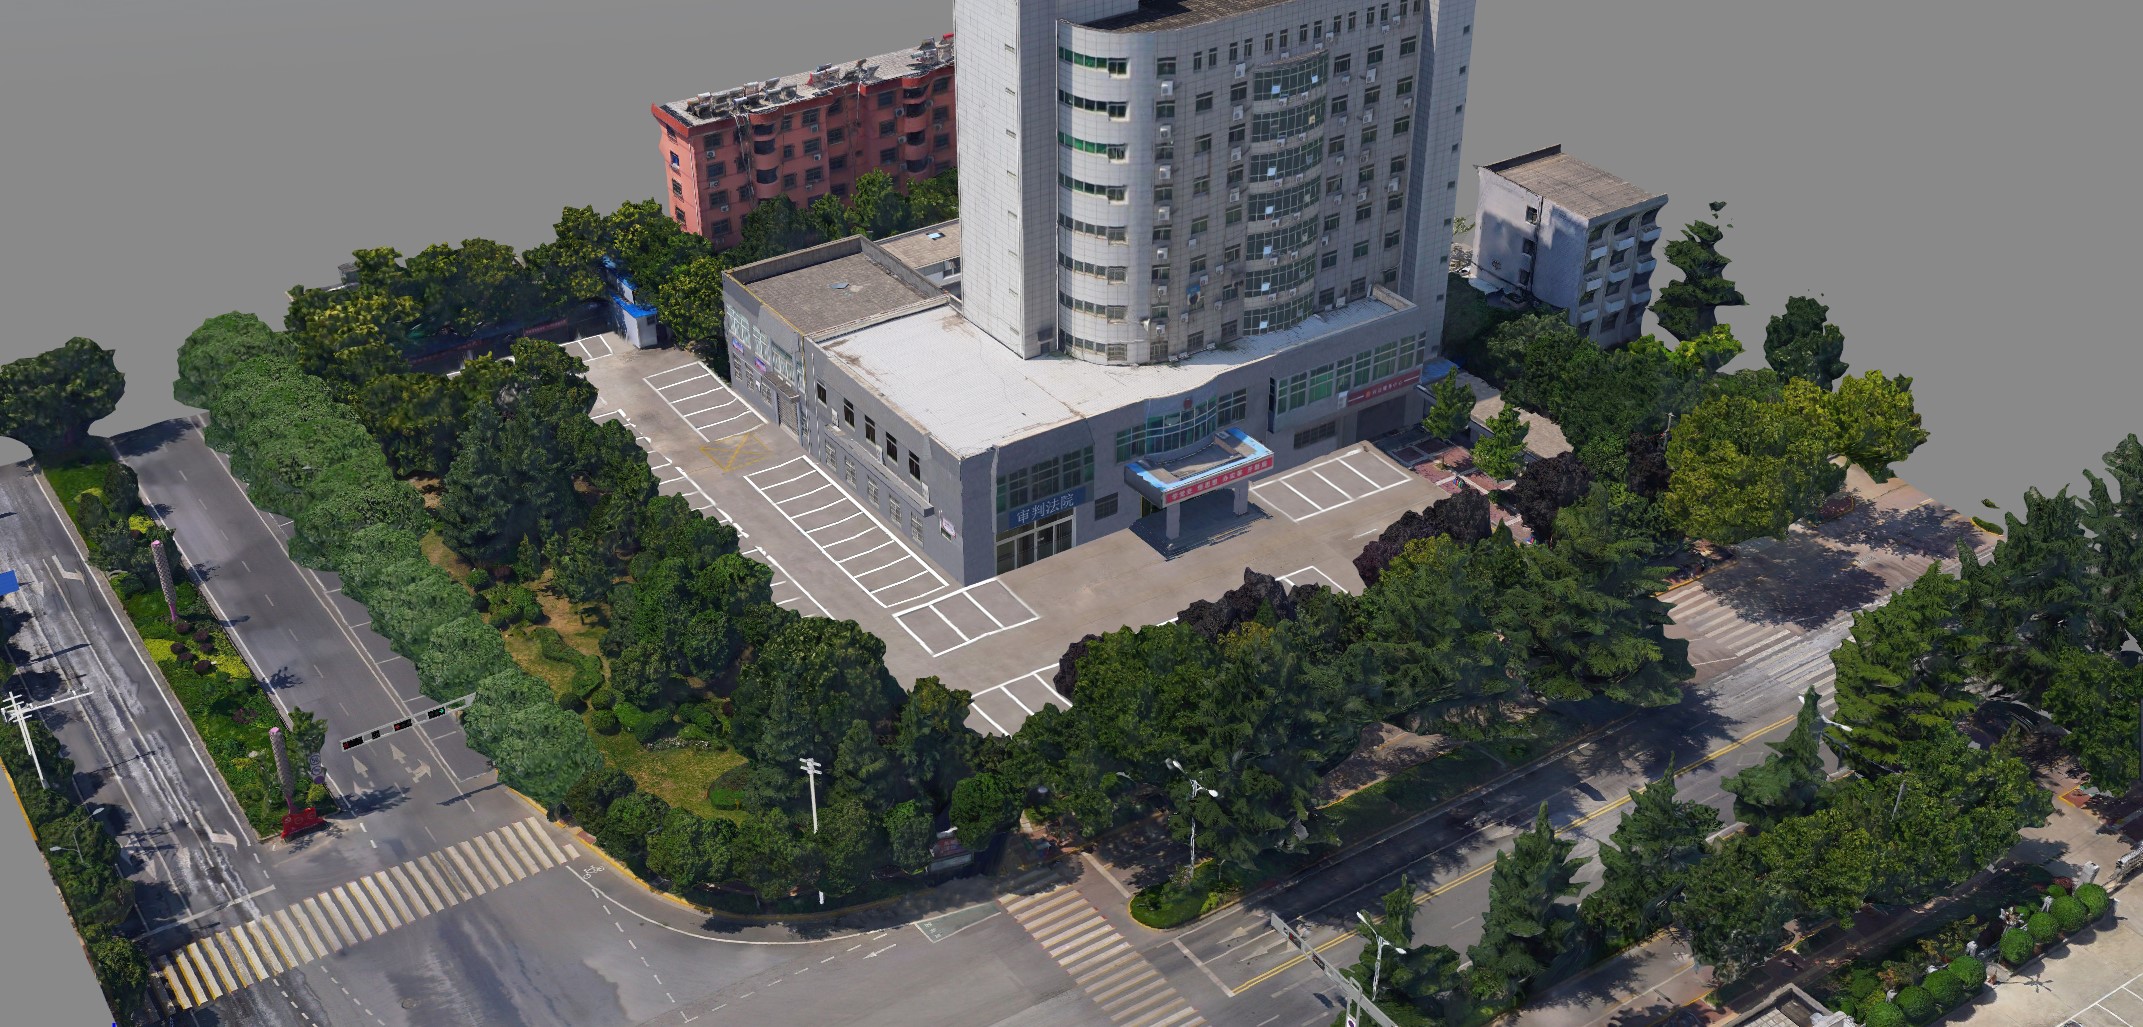
Drone photogrammetry can also produce textured 3D models by converting the reconstructed point cloud into a mesh and applying the original aerial imagery as texture.
The result is a realistic 3D representation of a site or object that users can rotate, zoom, and inspect from different viewpoints.
3D models are particularly useful for:
- Construction: Visualize site conditions and track project progress.
- Mining: Document pits, benches, stockpiles, and site changes.
- Archaeology and cultural heritage: Digitally preserve buildings, ruins, and archaeological sites.
- Urban planning: Visualize proposed developments within their surroundings.
- Infrastructure: Create detailed records of structures and assets.
- Visualization: Present complex sites to clients and other stakeholders.
Common formats include OBJ, FBX, GLB, and STL, depending on the intended application.
A 3D model is often easier for non-technical users to understand than a point cloud or terrain raster, making it particularly useful for communication and visualization.
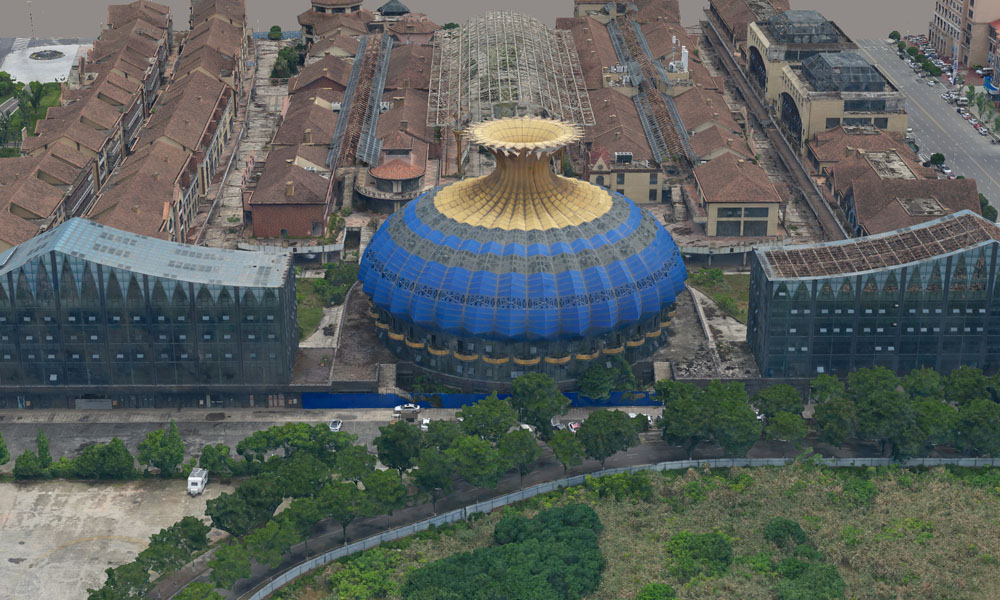
Contour and Topographic Maps
Photogrammetry-derived elevation data can be used to generate contour lines, which connect points with the same elevation.
Contour maps make changes in terrain easier to interpret and are commonly used to identify slopes, ridges, valleys, and depressions.
They are useful for:
- Road and site design
- Drainage planning
- Mining and quarry planning
- Agricultural land management
- Topographic surveys
- Construction planning
Contour intervals can be selected according to the project's requirements and the accuracy and resolution of the underlying elevation data.
The resulting vector data can be exported in formats such as DXF or SHP, while maps can also be delivered as PDF or other standard formats.
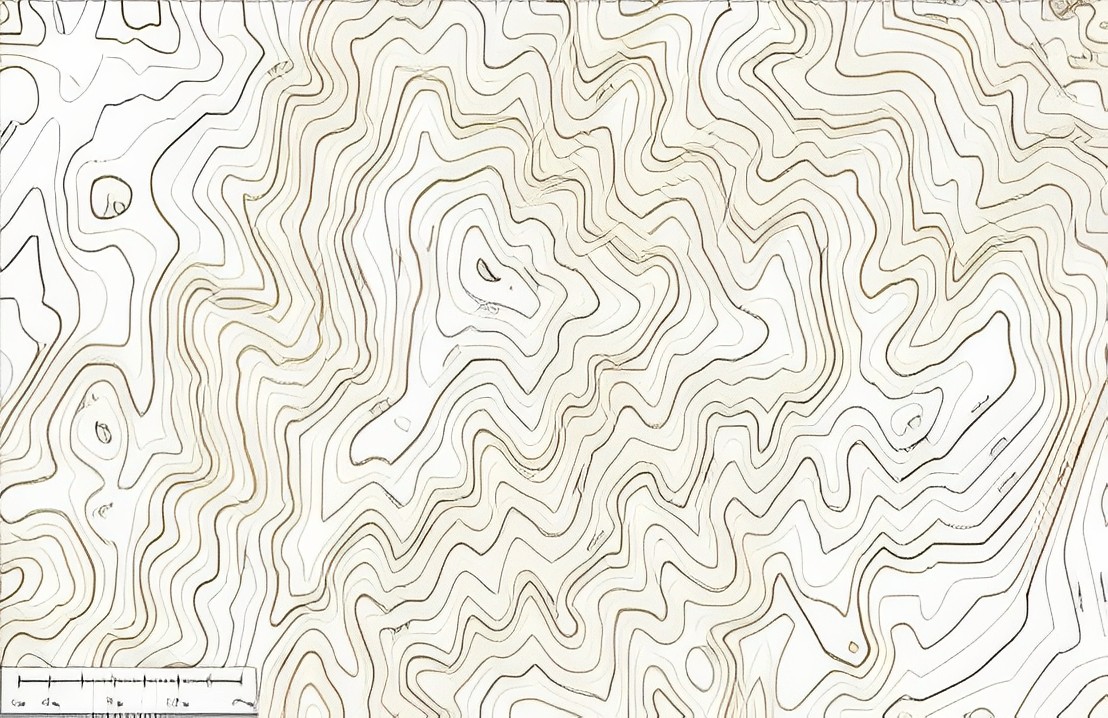
Digital Twins and Photogrammetry
Drone photogrammetry can also contribute to the creation of a digital twin, but it is important to distinguish the two.
A photogrammetry-based 3D model is primarily a spatial representation of a site or asset. A digital twin goes further by combining that spatial model with other information, such as BIM models, GIS data, IoT sensors, inspection records, maintenance history, or construction progress data.
For example, a construction project might combine repeated drone surveys with BIM data to compare as-designed and as-built conditions over time.
Similarly, infrastructure operators can use photogrammetry-derived 3D data as part of a broader digital environment for asset inspection, maintenance planning, and lifecycle management.
In other words, photogrammetry provides the spatial foundation; the digital twin adds the data and operational context around it.
From One Drone Survey to Multiple Deliverables
One of the biggest advantages of drone photogrammetry is that a single well-planned flight can support multiple outputs.
A typical workflow might look like:
Aerial Images → Point Cloud → Orthomosaic + DSM/DTM + 3D Model → Contours / Measurements / Analysis
This means you do not necessarily need a separate drone survey for every type of deliverable. If the imagery, GSD, overlap, positioning, and ground control were designed appropriately from the beginning, the same dataset can support mapping, surveying, volume calculations, terrain analysis, 3D visualization, and change monitoring.
The key is to define the required outputs before the flight, because the desired level of detail and accuracy will influence drone selection, camera settings, GSD, overlap, RTK/PPK, and the overall flight plan.
These are practical ranges rather than universal accuracy standards. The appropriate GSD depends on the smallest feature that needs to be identified or measured and the accuracy specification of the project.
GSD vs. Final Accuracy
One of the most common misconceptions in drone photogrammetry is that GSD equals accuracy.
It does not.
For example, imagery may have a GSD of 2 cm/pixel, but the resulting survey may have a horizontal accuracy of several centimeters or more depending on camera calibration, image quality, positioning, control points, terrain, and processing.
As a rule of thumb, achievable planimetric and vertical accuracy is often related to GSD, but the actual relationship varies significantly by workflow. Therefore, a project requiring a specific accuracy should be designed backward from the accuracy requirement rather than simply choosing the lowest possible GSD.
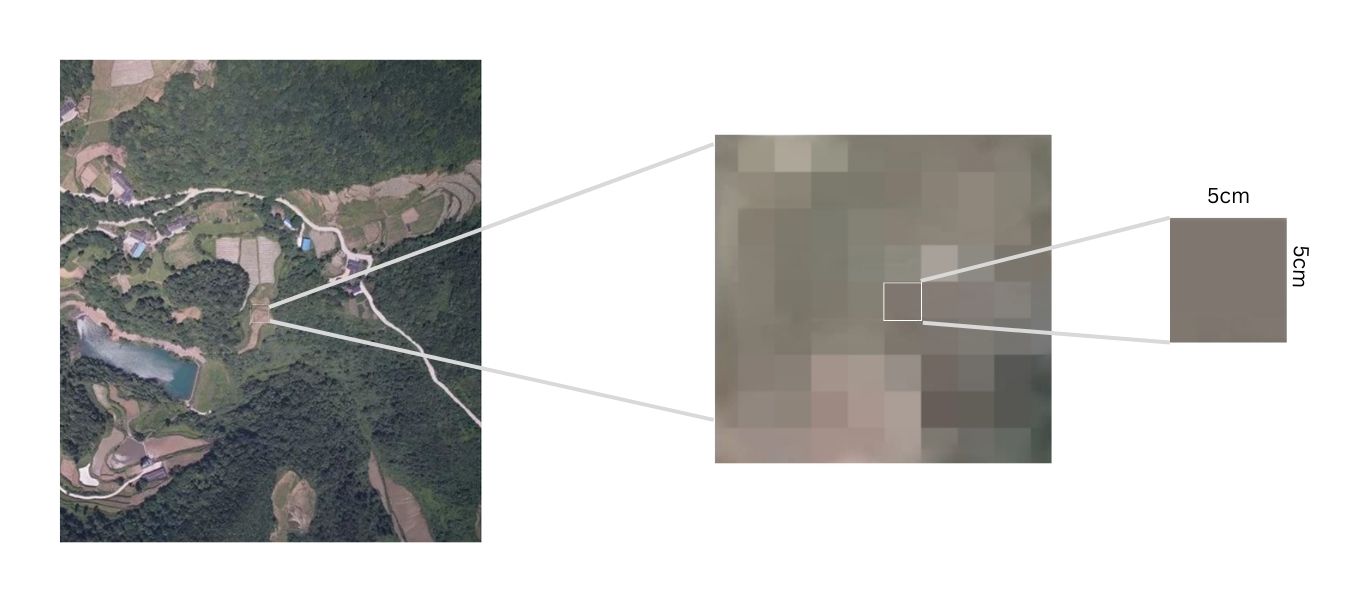
RTK vs. PPK Positioning
The positioning system determines how accurately the drone knows the location of its camera when each photograph is captured.
RTK (Real-Time Kinematic) receives positioning corrections during the flight, while PPK (Post-Processed Kinematic) applies corrections to the recorded GNSS observations after the flight.
Both can provide highly accurate camera positions and significantly improve the georeferencing of photogrammetric data.
RTK and PPK should not, however, be confused with the accuracy of the final photogrammetric product.
An RTK system may determine the camera position very accurately, but the resulting orthomosaic or 3D model can still contain errors caused by camera calibration, image quality, terrain, processing, or incorrect control data.
Ground Control Points (GCPs)
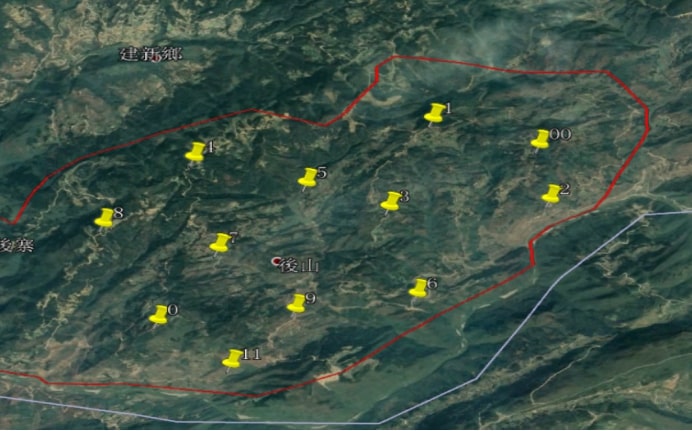
Ground Control Points (GCPs) are clearly identifiable points on the ground whose coordinates have been accurately surveyed using GNSS equipment, a total station, or another appropriate surveying method.
During photogrammetric processing, the known coordinates of these points are used to constrain and georeference the model.
GCPs are particularly useful when:
- High absolute accuracy is required
- Vertical accuracy is important
- The drone does not have reliable RTK/PPK positioning
- The project needs to align with an existing coordinate system
- The site has difficult GNSS conditions
- Independent verification of the photogrammetric model is required
GCP distribution is often more important than simply increasing the number of points. They should generally be distributed across the survey area and, where appropriate, at different elevations rather than concentrated in one location.
There is no universal number of GCPs that works for every project. The appropriate number depends on survey size, terrain, required accuracy, flight configuration, positioning technology, and applicable surveying standards.
Checkpoints for Accuracy Verification
Checkpoints are different from GCPs.
A GCP is used during processing to help constrain the model. A checkpoint is measured independently but not used to control the adjustment. It is then compared with the corresponding location in the final photogrammetric dataset.
This makes checkpoints one of the most useful ways to determine whether the delivered data actually meets the project's accuracy requirements.
For professional projects, reporting independent checkpoint results is generally more meaningful than simply reporting the drone's RTK specification or software's internal processing statistics.
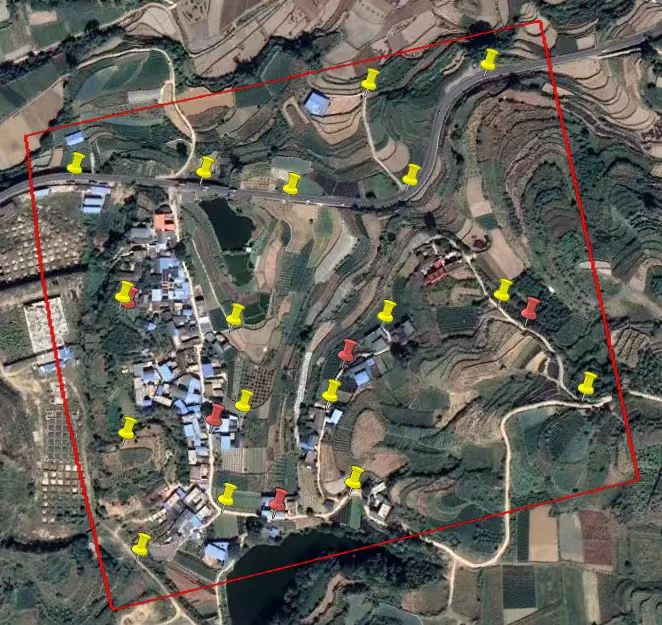
Image Overlap
Photogrammetry relies on seeing the same features from multiple images. Image overlap therefore has a direct effect on the reliability of image matching and 3D reconstruction.
Two important parameters are:
Front overlap: The percentage of overlap between consecutive images along the flight path.
Sidelap: The percentage of overlap between images on adjacent flight lines.
For many standard mapping missions, approximately 75–80% front overlap and 60–70% sidelap provide a useful starting point. More overlap may be appropriate for complex terrain, vegetation, tall structures, or projects requiring particularly robust reconstruction.
However, there is no single overlap setting that is optimal for every mission.
Insufficient overlap can cause:
- Gaps in coverage
- Weak image matching
- Poor reconstruction in difficult areas
- Reduced point-cloud density
- Incomplete 3D models
Increasing overlap improves the redundancy of observations, but it also increases the number of photographs, storage requirements, processing time, and sometimes flight time.
Camera and Flight Parameters
The camera is the foundation of the photogrammetric dataset. Even a high-end drone cannot compensate for poor-quality imagery.
Important camera and flight parameters include:
A global-shutter camera is generally preferred for professional mapping because all pixels are captured at essentially the same instant. Rolling-shutter cameras can still be used for photogrammetry, particularly when the processing software properly models rolling-shutter effects, but flight speed, camera calibration, and image quality become more important.
Lighting, Weather, and Terrain
Environmental conditions can have a surprisingly large impact on photogrammetry results.
- Lighting: Strong shadows can hide surface features and make image matching more difficult. Consistent, diffuse lighting is often preferable, particularly when mapping areas with significant texture or elevation changes.
- Wind: Strong wind can cause the drone to tilt, vibrate, or deviate from the planned flight path. Combined with slow shutter speeds, this can introduce motion blur and reduce image quality.
- Rain and fog: Moisture, fog, and precipitation can reduce image clarity and visibility and may make flight unsafe.
- Surface texture: Photogrammetry works best when the surface contains recognizable features. Uniform surfaces such as smooth water, fresh asphalt, snow, or large areas of featureless soil can be difficult for image-matching algorithms.
- Terrain variation: Large changes in elevation can affect GSD and image overlap when the drone maintains a constant altitude. Terrain-following flight can help maintain more consistent image geometry.
Processing Software and Settings
Image capture is only half of the photogrammetry workflow. The processing stage converts overlapping photographs into a georeferenced 2D or 3D dataset, so processing choices can also affect the final result.
Different software packages use different algorithms and processing workflows, but the major stages generally include image alignment, camera calibration and optimization, point-cloud generation, georeferencing, and output generation.
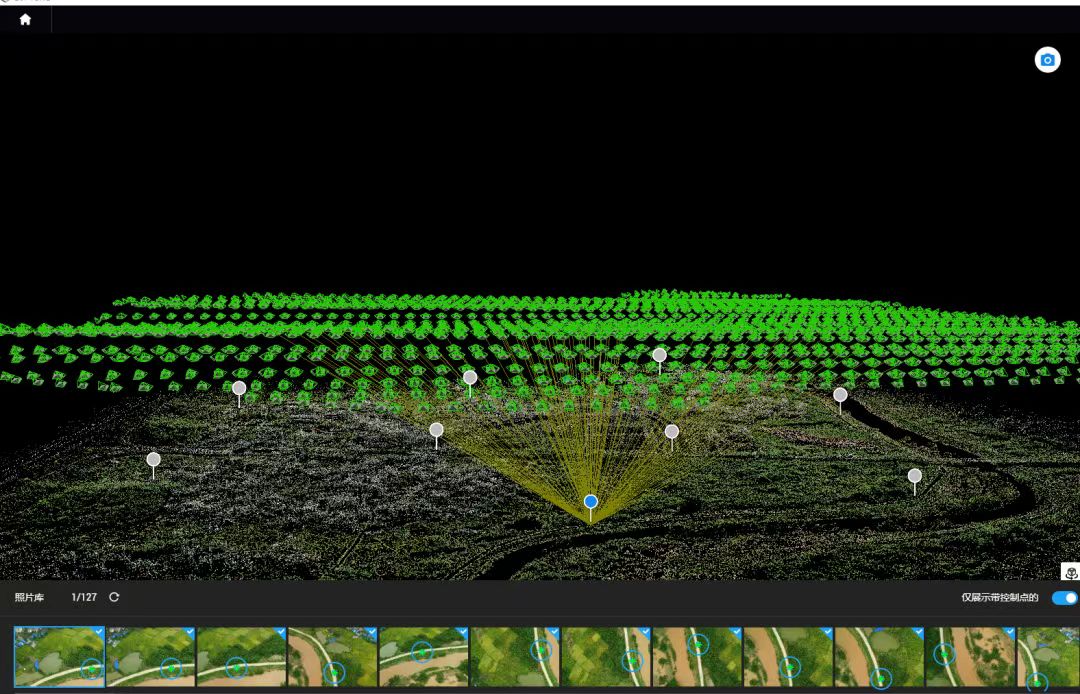
Can RTK Drone Photogrammetry Work Without GCPs?
Yes. An RTK- or PPK-equipped drone can perform photogrammetry without traditional GCPs in some applications.
The key question is not whether RTK/PPK can replace GCPs in principle, but whether the resulting dataset can meet the project's required absolute accuracy without them.
GCPs may be reduced or omitted when:
- The required accuracy is relatively modest
- The RTK/PPK positioning solution is reliable
- The correction source is properly configured
- Camera calibration and image quality are well controlled
- The survey area has favorable GNSS conditions
- The project does not require legal or survey-grade certification
- Independent checkpoints are available for verification
GCPs remain valuable when:
- Centimeter-level absolute accuracy is required
- Vertical accuracy is critical
- The project has strict engineering or surveying requirements
- GNSS conditions are difficult
- The drone's positioning solution is unreliable
- The dataset must be independently validated
Even when GCPs are not used for georeferencing, checkpoints can provide an important independent accuracy check.
How to Improve Drone Photogrammetry Accuracy?
If accuracy is a priority, focus on the entire workflow rather than upgrading only the drone.
- Define the required accuracy first. The accuracy requirement should determine your GSD, positioning system, control strategy, and flight plan.
- Choose an appropriate camera. Resolution, shutter type, lens quality, and calibration all matter.
- Use an appropriate GSD. Do not fly higher than necessary if small features or precise measurements are required.
- Maintain sufficient image overlap. Increase overlap when mapping complex terrain or structures.
- Use RTK or PPK when appropriate. Accurate camera positioning improves georeferencing and can reduce the need for extensive GCP networks.
- Use well-distributed GCPs when required. GCPs are particularly valuable for demanding absolute-accuracy projects.
- Use independent checkpoints. They provide a much more meaningful validation of final accuracy.
- Avoid motion blur. Adjust shutter speed and flight speed to maintain sharp imagery.
- Fly under suitable conditions. Consistent lighting and moderate wind generally produce better data.
- Process the data carefully. Review image alignment, camera calibration, control-point residuals, point-cloud quality, and other processing indicators.
- Report actual accuracy. Where accuracy matters, use GCPs or checkpoints to quantify the horizontal and vertical error of the final dataset.
Ultimately, drone photogrammetry accuracy is a workflow-level result, not a specification that belongs to the drone alone. A high-resolution camera, RTK/PPK positioning, appropriate GSD, sufficient overlap, reliable ground control, and careful processing can work together to produce highly accurate mapping data. Conversely, even an expensive mapping drone can produce poor results when the flight plan, imagery, positioning, or quality control is inadequate.
Pix4D
Pix4D is widely used for professional drone mapping and surveying. Its ecosystem includes PIX4Dmapper, PIX4Dmatic, and PIX4Dcloud, covering desktop processing, large-scale mapping, and cloud collaboration. It supports GCPs, RTK/PPK workflows, orthomosaics, point clouds, DSMs, 3D models, and quality reports.
- Best For: Professional surveying, construction, mapping, and projects requiring detailed accuracy control.
- Pros: Comprehensive photogrammetry tools; strong GCP and RTK/PPK workflows; desktop and cloud options; detailed quality reports.
- Cons: Relatively expensive; advanced capabilities are distributed across different products.
- Pricing: Paid subscription or license, depending on the product. Pix4D offers different plans for desktop and cloud workflows; current pricing varies by product and license type.
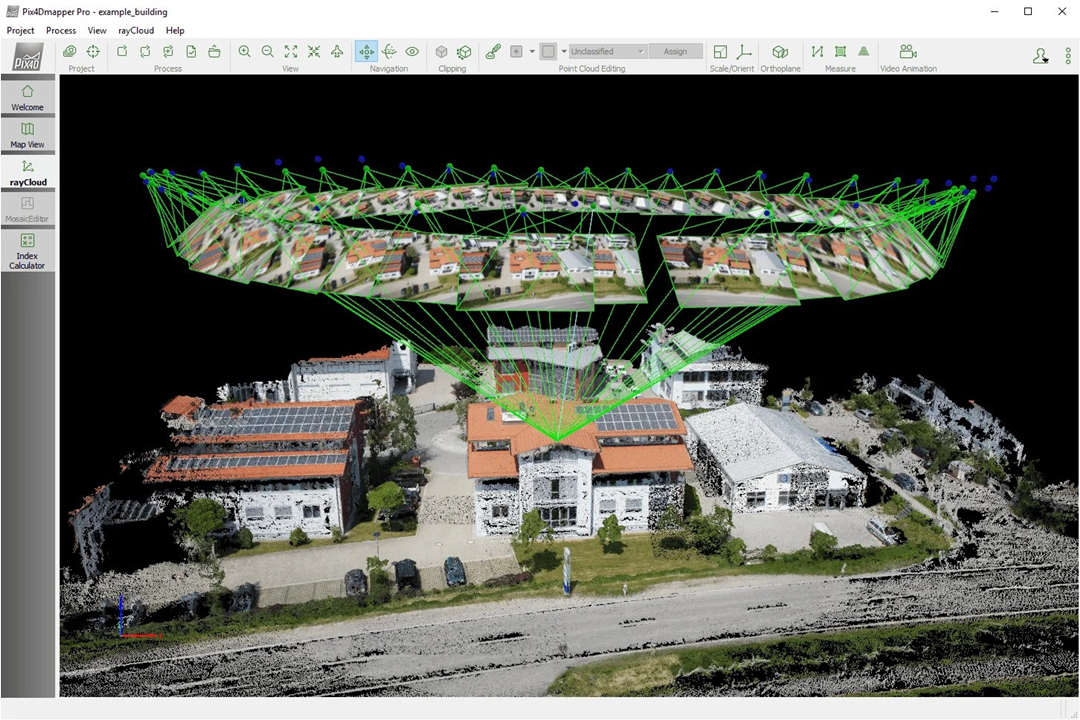
Image credit: https://drone.ua/
Agisoft Metashape
Agisoft Metashape is a professional desktop photogrammetry platform that provides detailed control over image alignment, georeferencing, dense reconstruction, and 3D model generation. It supports GCPs, checkpoints, multispectral and thermal imagery, and a wide range of mapping outputs.
- Best For: Surveyors, researchers, archaeologists, and advanced users who need offline processing and greater control.
- Pros: Extensive processing controls; strong GCP and accuracy-validation workflows; supports multiple sensor types; works offline.
- Cons: Steeper learning curve; large datasets and dense reconstruction can require substantial computing power.
- Pricing: Perpetual license available, with separate editions and commercial/educational pricing. A subscription option is also available for some users.
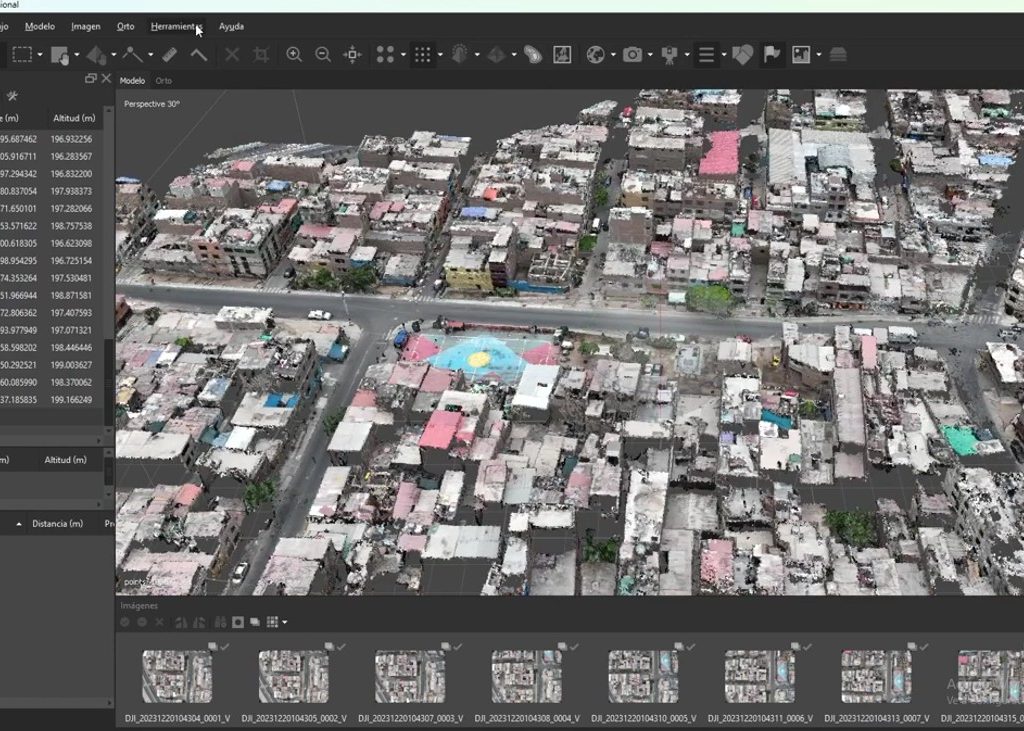
Image credit: https://www.metashape-la.com/
DroneDeploy
DroneDeploy is a cloud-based platform that combines drone mapping, processing, measurement, and collaboration. It can produce orthomosaics, 3D models, point clouds, DSMs, and volumetric measurements without requiring a high-end local workstation.
- Best For: Construction, site monitoring, surveying, and teams managing multiple projects.
- Pros: Easy cloud-based workflow; strong collaboration features; no dedicated processing workstation required; supports repeatable site mapping.
- Cons: Subscription-based; dependent on cloud processing; less low-level processing control than desktop software.
- Pricing: Subscription-based. DroneDeploy offers several plans, with pricing depending on features, users, and enterprise requirements; enterprise plans typically require a custom quote.
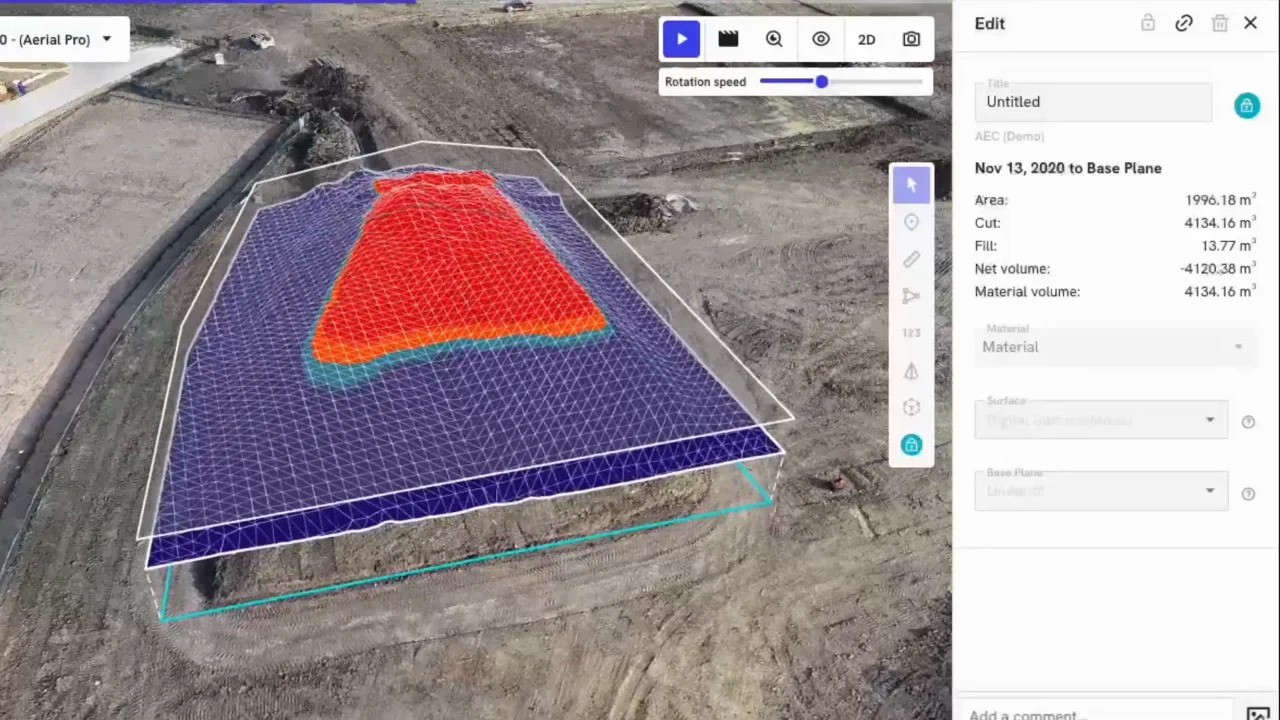
Image credit: https://www.dronedeploy.com/
DJI Terra
DJI Terra is DJI's desktop software for 2D mapping and 3D reconstruction. It integrates closely with DJI Enterprise drones and supports visible-light imagery as well as DJI LiDAR data.
- Best For: DJI Enterprise users, surveying, infrastructure, and rapid 2D/3D reconstruction.
- Pros: Strong DJI hardware integration; straightforward workflow; supports photogrammetry and DJI LiDAR data.
- Cons: Windows-based; primarily suited to the DJI ecosystem; larger projects require a capable workstation.
- Pricing: Paid software license. Pricing varies by license type, region, and version, so users should check the latest DJI Enterprise pricing before purchasing.
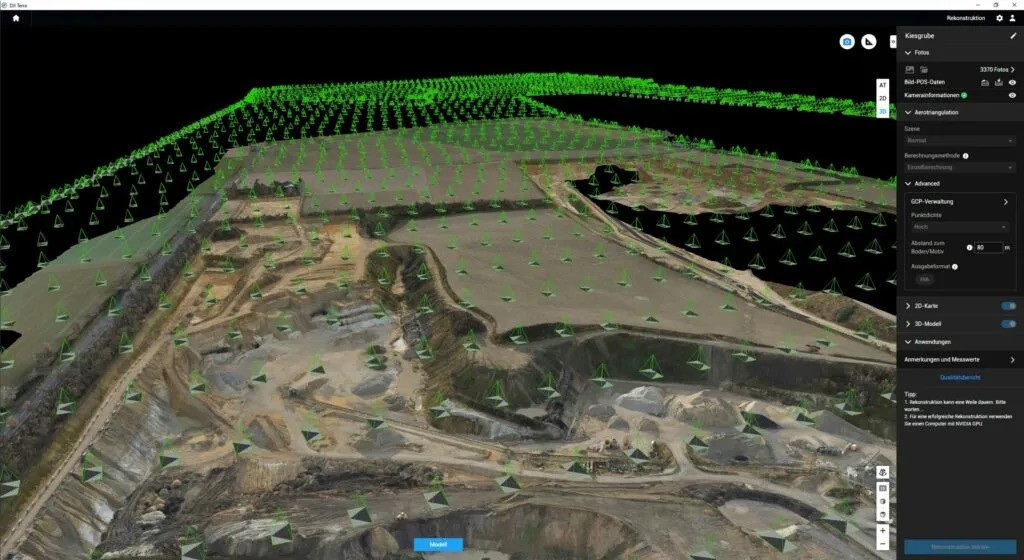
Image credit: https://www.terrestrialimaging.com/
WebODM
WebODM is an open-source drone mapping platform that processes imagery locally and can generate orthomosaics, point clouds, DSMs/DTMs, 3D models, and measurements. It is a practical option for users who want to avoid recurring commercial software fees.
- Best For: Budget-conscious users, education, research, and small mapping projects.
- Pros: Open source; local and offline processing; no recurring software license; flexible data control.
- Cons: More technical to set up and operate; processing depends on local hardware; less commercial support.
- Pricing: Free and open source. Users may still incur costs for hardware, cloud deployment, or technical support.
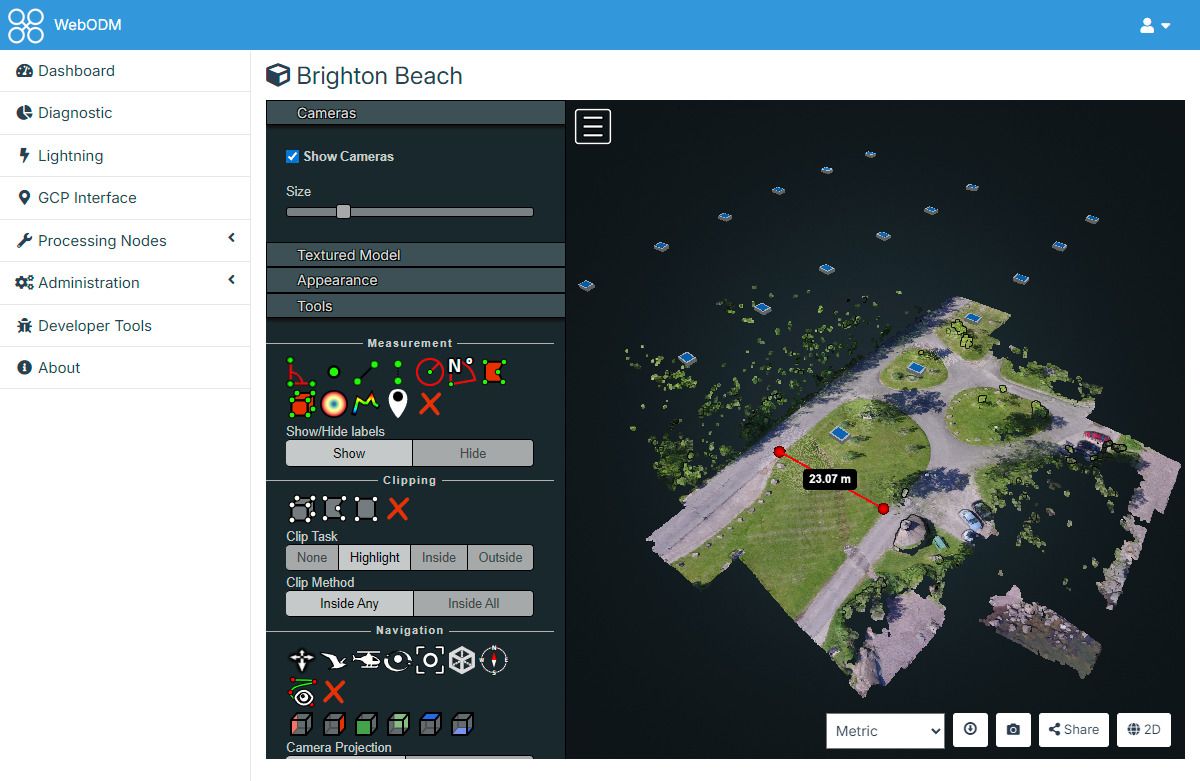
Image credit: https://webodm.org/
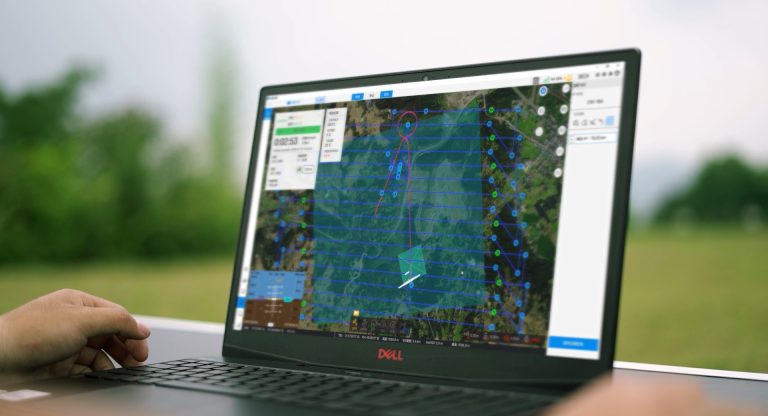
JOUAV FlightSurv
JOUAV FlightSurv is a cloud-based mapping platform designed for JOUAV VTOL drones, combining flight planning, data management, and photogrammetry processing for large-area missions. It supports KML-based route generation, multiple mission plans in a single flight, and TDOM and DSM generation, while offering enterprise users API integration, custom algorithms, white-label solutions, and industry-specific workflows.
- Best For: JOUAV VTOL users, large-area mapping, government agencies, and enterprise projects requiring customized workflows.
- Pros: Integrated flight planning and mapping workflow; designed for large-area VTOL mapping; cloud processing; flexible enterprise customization and integration.
- Cons: Primarily optimized for JOUAV drones; cloud processing requires an internet connection; custom development is mainly relevant to enterprise users.
- Pricing: Commercial platform with pricing depending on the deployment, capabilities, and customization requirements. Enterprise and customized solutions are typically provided by quotation.
*Vegetation indices such as NDVI require multispectral imagery rather than standard RGB photogrammetry.
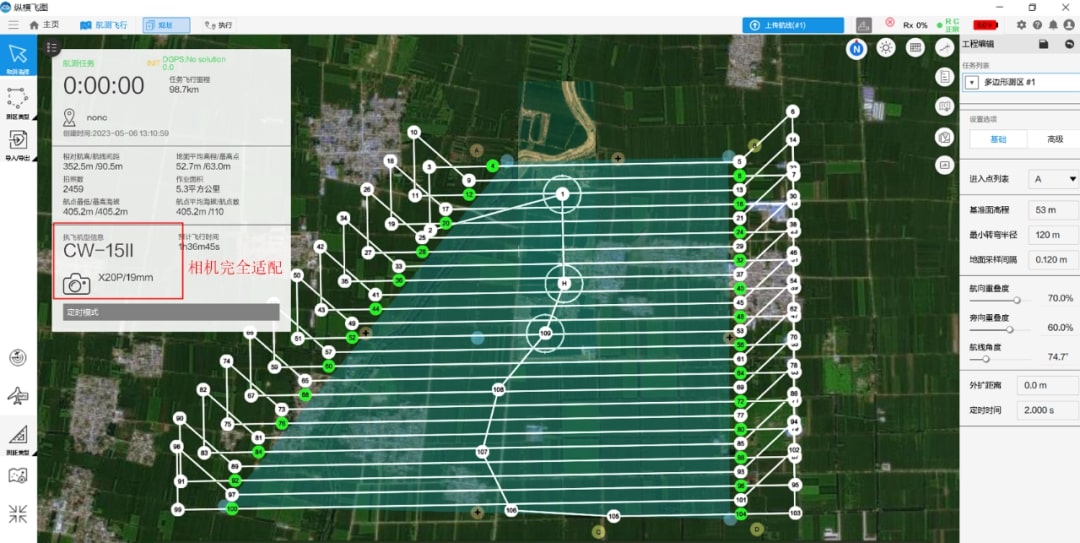
Land Surveying and Mapping
Surveying remains one of the most common uses of drone photogrammetry. Drones can quickly capture large areas and produce detailed base maps for:
- Topographic surveys and contour mapping
- Site planning and land development
- Construction and engineering surveys
- Cadastral and property mapping where the required accuracy and regulations allow
Typical outputs: Orthomosaics, point clouds, DSMs/DTMs, contour maps, and 3D models.
Construction
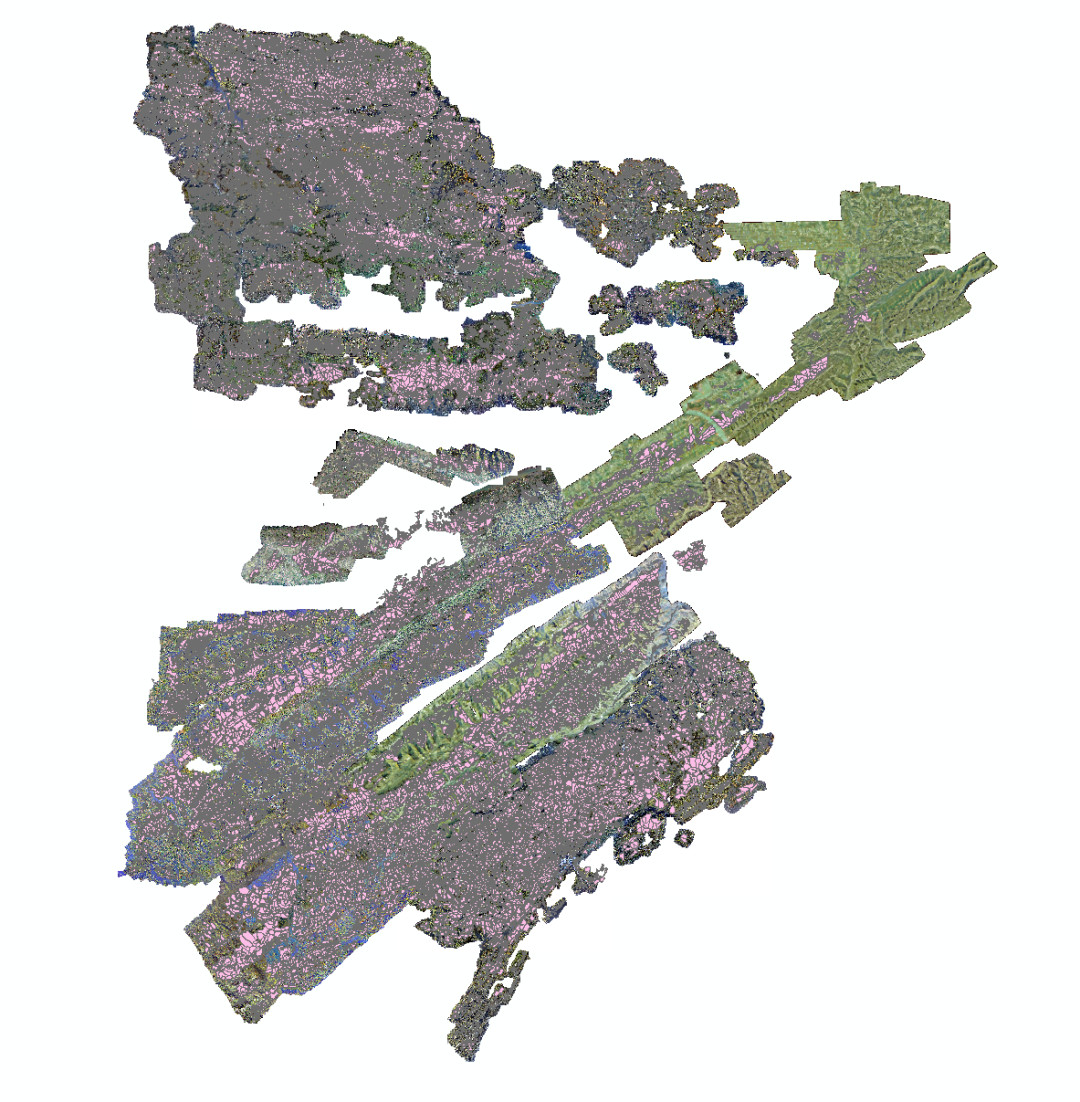
Construction teams use drone photogrammetry to create repeatable aerial records throughout a project's lifecycle. Common applications include:
- Site progress monitoring
- Stockpile and earthwork volume calculations
- Cut-and-fill analysis
- As-built documentation
- Site logistics and planning
Comparing surveys from different dates can also help project managers identify progress, changes, and potential delays.
Typical outputs: Orthomosaics, 3D models, point clouds, DSMs/DTMs, and volume measurements.
Mining and Quarrying
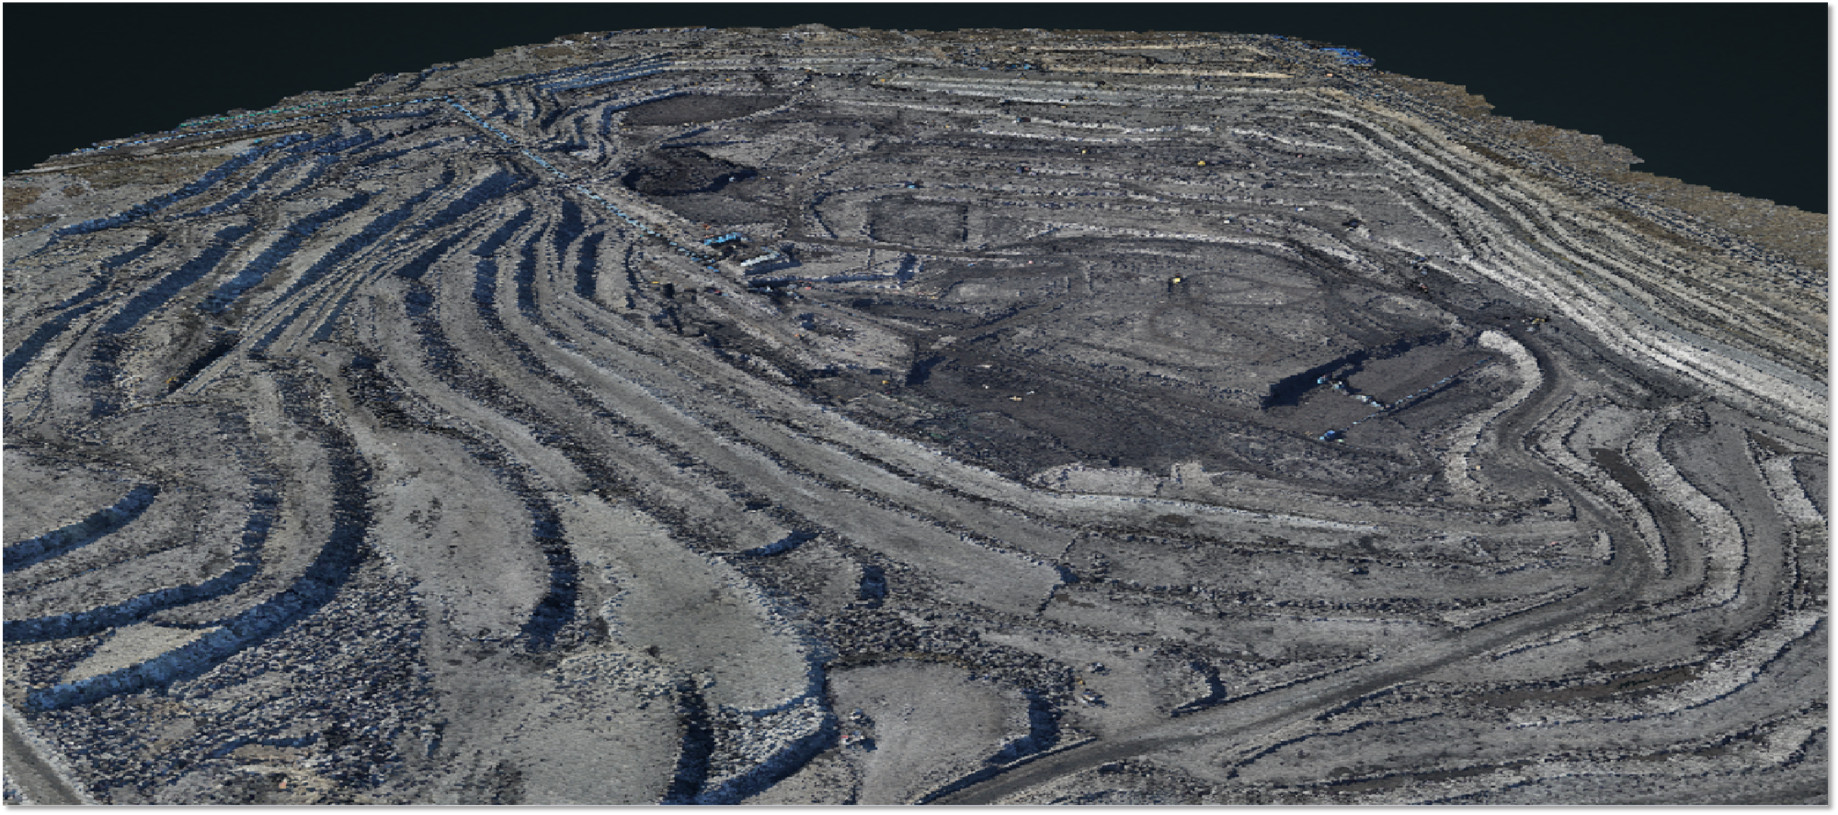
In mining and quarrying, frequent aerial surveys provide an efficient way to measure large and changing sites. Photogrammetry is commonly used for:
- Stockpile and material volume calculations
- Pit and terrain mapping
- Bench and haul-road documentation
- Site change monitoring
- Mine planning and reporting
Typical outputs: Point clouds, 3D models, DSMs/DTMs, contour maps, and volumetric reports.
Agriculture
Drone photogrammetry can provide detailed field maps for precision agriculture and farm management. It can be used for:
- Field and boundary mapping
- Crop height and canopy analysis
- Irrigation and drainage planning
- Terrain and elevation mapping
- Plant counting with high-resolution imagery
When a multispectral camera is used, the same drone survey can also support vegetation-index analysis such as NDVI.
Typical outputs: Orthomosaics, elevation models, 3D models, and vegetation maps when multispectral data is available.
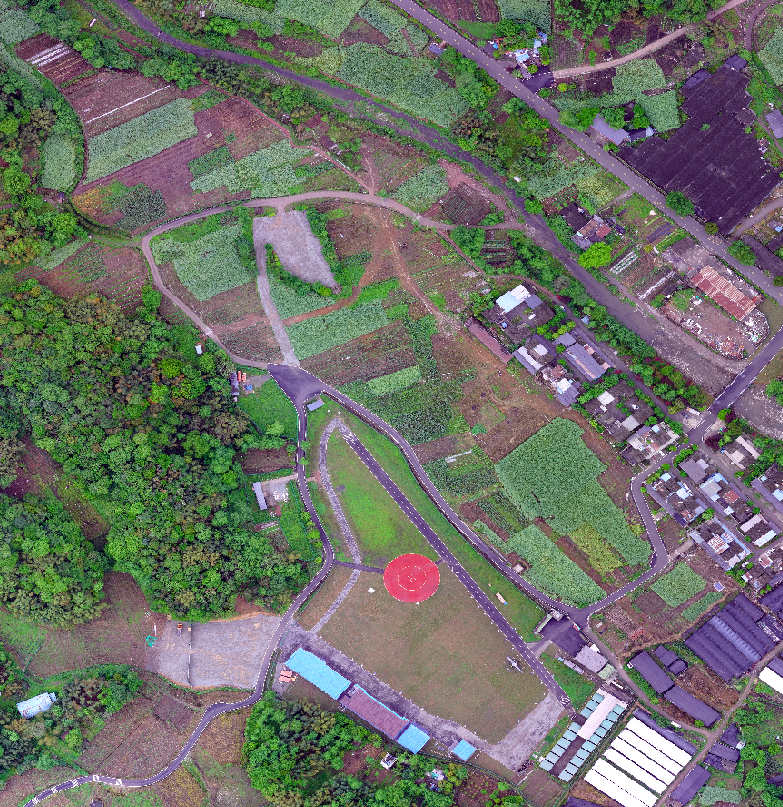
Infrastructure and Utilities
Photogrammetry is useful for mapping and documenting roads, railways, bridges, power corridors, pipelines, and other infrastructure. Typical applications include:
- Road and railway corridor mapping
- Power-line and pipeline right-of-way surveys
- 3D documentation of structures
- Construction and maintenance planning
- Creating updated GIS asset data
For detailed inspection of small defects or components, photogrammetry can complement rather than replace close-range visual or LiDAR-based inspection.
Typical outputs: Orthomosaics, 3D models, point clouds, DSMs/DTMs, and GIS-ready data.
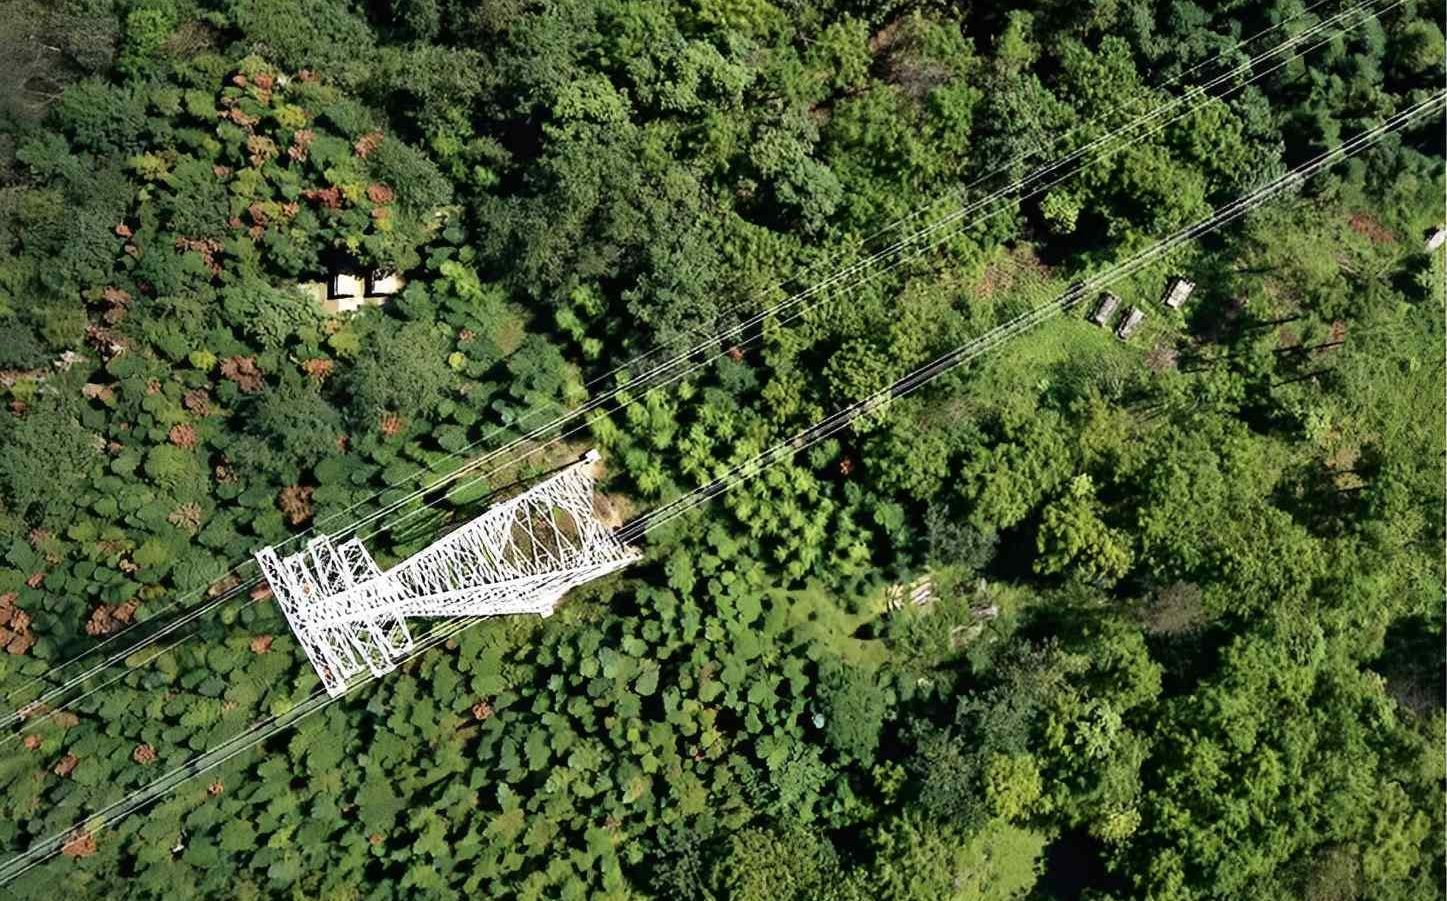
Archaeology and Cultural Heritage
Archaeologists use drone photogrammetry to document sites and landscapes without extensive physical access or disturbance. It can help with:
- Excavation and site documentation
- 3D reconstruction of monuments and structures
- Mapping archaeological landscapes
- Monitoring erosion and site changes
- Creating digital records for research and preservation
Typical outputs: High-resolution orthomosaics, 3D models, point clouds, and elevation models.

Environmental Monitoring
Because drone surveys can be repeated relatively quickly, photogrammetry is well suited to monitoring changes in natural environments. Applications include:
- Coastal and shoreline change monitoring
- Riverbank and erosion mapping
- Wetland and habitat mapping
- Vegetation and land-use change monitoring
- Landslide and terrain-change assessment
Typical outputs: Orthomosaics, DSMs/DTMs, point clouds, and multi-date change maps.
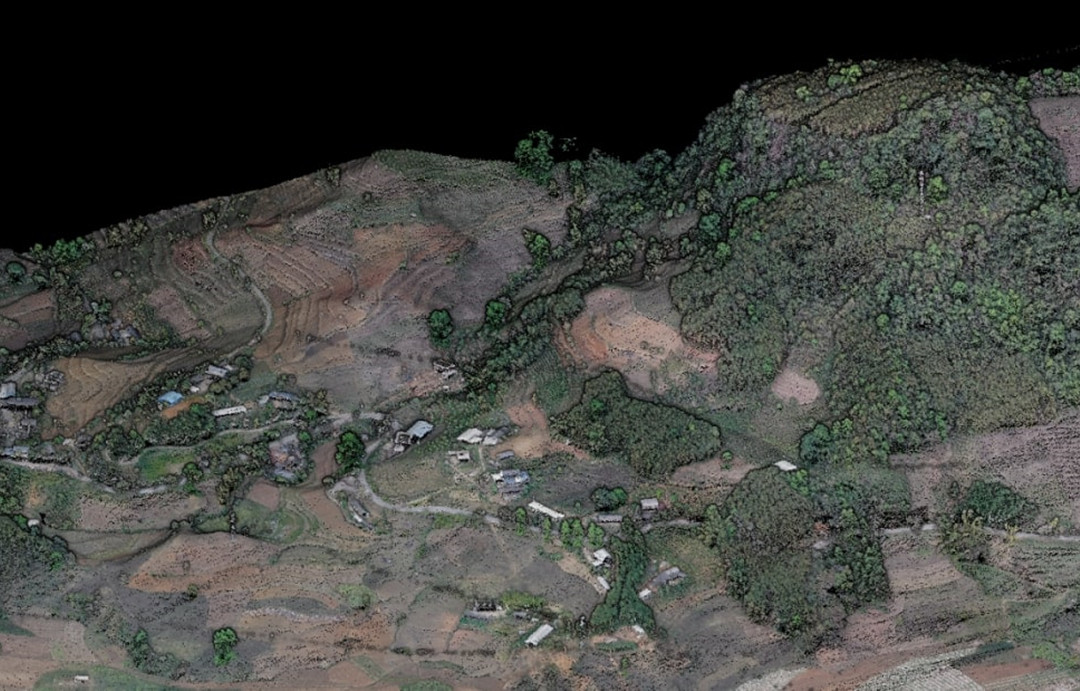
Disaster Response
After floods, landslides, earthquakes, fires, and other disasters, drones can rapidly collect aerial imagery from areas that may be difficult or unsafe to access. Photogrammetry can support:
- Rapid emergency mapping
- Damage assessment
- Road and infrastructure condition mapping
- Pre- and post-event comparison
- Recovery and reconstruction planning
Typical outputs: Rapid orthomosaics, 3D models, point clouds, and elevation data.
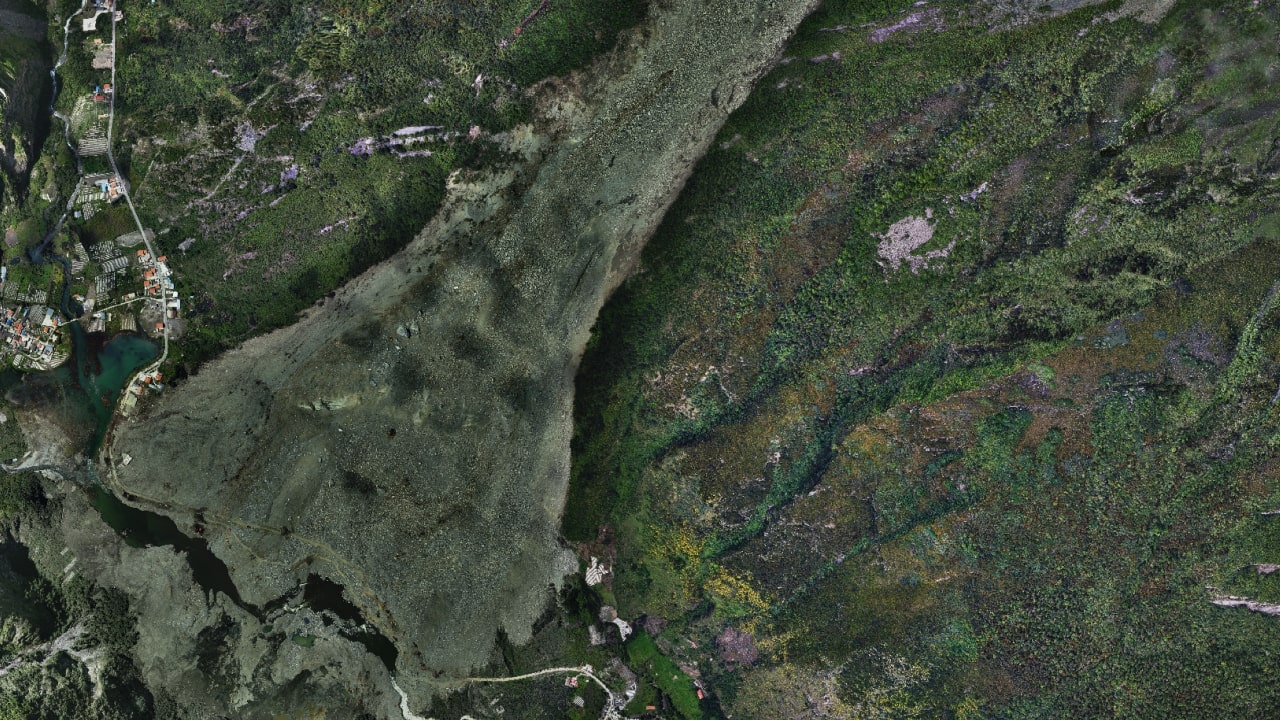
How Photogrammetry Works vs. LiDAR?
Photogrammetry is a passive technology that extracts 3D geometry from 2D images. It relies on capturing hundreds of overlapping aerial photos and using algorithms (Structure from Motion) to identify common points across images, triangulating their 3D positions. The quality of the output depends heavily on good lighting, image texture, and surface visibility.
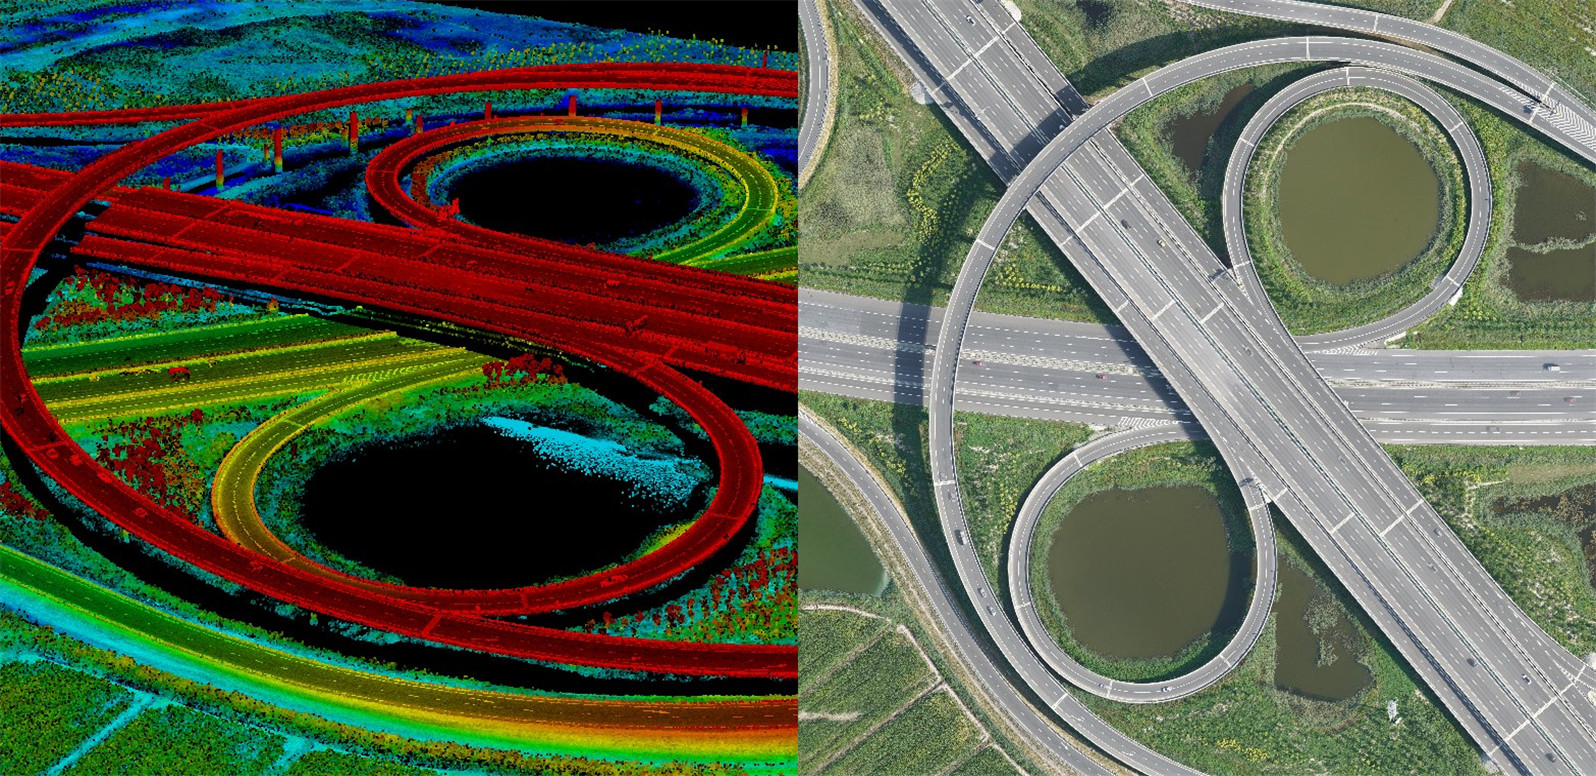
LiDAR is an active technology that emits laser pulses toward the ground and measures the time it takes for each pulse to return. This direct distance measurement generates a 3D point cloud. A key advantage is that LiDAR can record multiple returns from a single laser pulse. This allows it to penetrate gaps in vegetation, recording returns from the canopy, understory, and the bare ground.
Vegetation Penetration
This is the most critical difference. Photogrammetry can only "see" the surface that is visible in the images. Dense tree canopies, tall grass, and heavy brush block the camera, so the resulting model represents the top of the vegetation (a Digital Surface Model, or DSM), not the true ground.
In contrast, LiDAR's multi-return capability allows it to see through vegetation to the ground below. By filtering out vegetation returns, surveyors can generate a precise Digital Terrain Model (DTM) that accurately represents the bare earth, even under forest cover. A 2025 study on historical landscapes confirmed LiDAR's clear superiority for detecting terrain anomalies in areas with dense vegetation.
Accuracy
Both technologies can achieve centimeter-level accuracy, but they achieve it differently.
Photogrammetry can deliver high accuracy when supported by Ground Control Points (GCPs) or RTK/PPK positioning. One study comparing the two in a 1.7-hectare onion field found a standard deviation of only 4.1 cm between their 3D models. However, photogrammetry's accuracy is more dependent on ideal conditions. The same study noted that LiDAR was better suited for understanding the 3D growth of slender, upright plants, where photogrammetry had more difficulty.
LiDAR provides a more consistent, direct, and repeatable measurement of the terrain, regardless of surface texture. For applications requiring a highly accurate DTM in complex or vegetated terrain, LiDAR is generally the superior choice.
Lighting and Weather Conditions
As a passive technology, photogrammetry is dependent on sunlight. It performs best on clear, overcast days when shadows are minimized. It struggles in low-light conditions, at dawn or dusk, or in areas with harsh shadows.
LiDAR is an active sensor that emits its own light source. It can operate effectively in low-light conditions, at night, or in shadowed areas, providing consistent results regardless of ambient lighting.
Cost
Photogrammetry is generally the more cost-effective solution. It only requires a high-quality mapping camera (e.g., a 20 MP or 40 MP sensor with a mechanical shutter) and standard photogrammetry software, which can range from free options like OpenDroneMap to paid licenses like Pix4D or Metashape.
LiDAR systems are significantly more expensive. The sensors themselves cost tens of thousands of dollars, and the required processing software and expertise add to the overall cost. This makes LiDAR a more significant capital investment, typically justified for specialized projects where its unique capabilities are essential.
In summary
Photogrammetry is the preferred choice for most general mapping, construction, and agricultural projects where surfaces are visible and cost is a key factor.
LiDAR is the essential tool when you need to see through vegetation, require a precise bare-earth DTM, or must operate in challenging light conditions.
For maximum versatility, integrated payloads allow you to capture both photogrammetric and LiDAR data simultaneously, giving you the most comprehensive dataset possible.
These figures are broad equipment ranges rather than fixed market prices. Actual costs depend heavily on the camera, RTK/PPK configuration, payload, batteries, controller, base station, and other accessories.
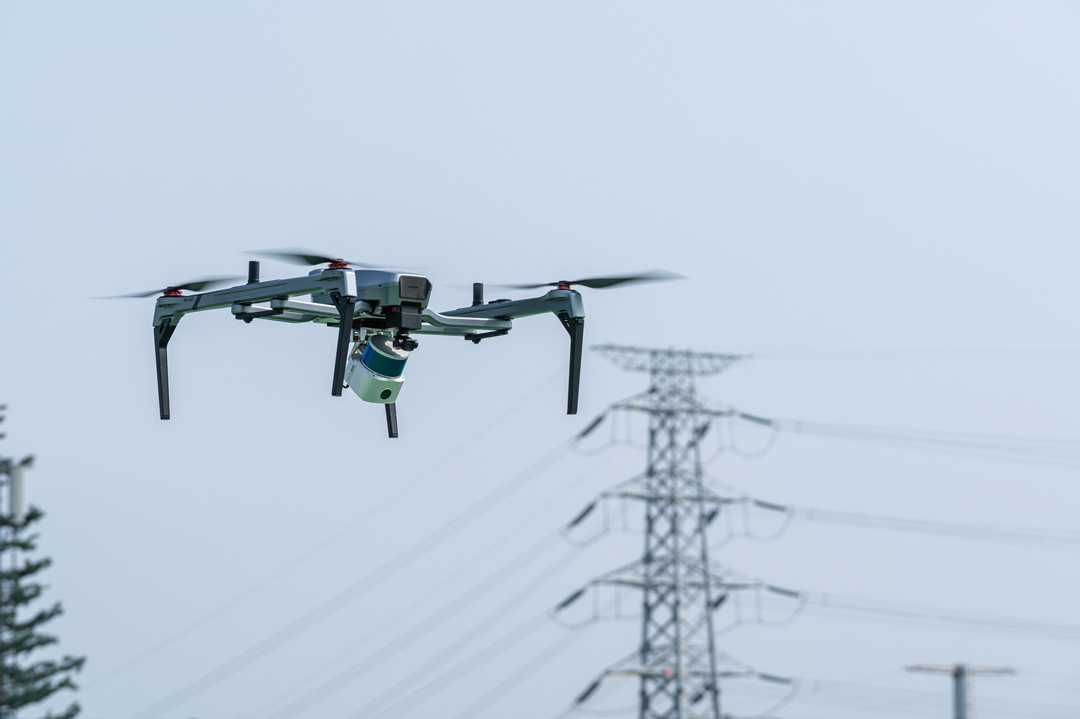
For photogrammetry, the camera is particularly important. A higher-resolution sensor, mechanical shutter, larger sensor size, and better lens can improve image quality and allow the drone to capture the required GSD more efficiently.
Photogrammetry Software Cost
Software is another major part of the total cost. Depending on the workflow, you can choose from free/open-source software, desktop applications, or cloud-based platforms.
The cheapest software is not always the most economical choice. For occasional projects, cloud processing can eliminate the need for a powerful workstation. For companies processing large datasets regularly, a desktop solution may provide a lower cost per project over time.
Ground Control and Surveying Costs
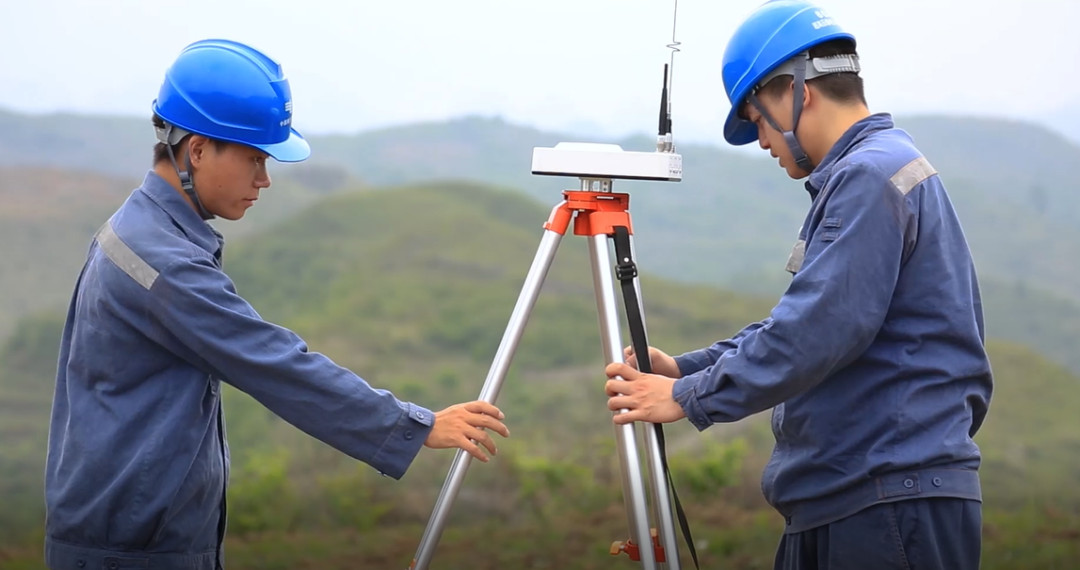
If the project requires high absolute accuracy, Ground Control Points (GCPs) and independent checkpoints can add a significant amount of fieldwork.
The cost may include:
- GNSS rover or total station
- RTK/PPK base station
- GCP targets and markers
- Surveyor labor
- Travel to and from the site
- Time required to establish and measure control points
An RTK/PPK-equipped drone can reduce the need for numerous GCPs, but it does not automatically eliminate the need for ground control on every project. For engineering, cadastral, or other high-accuracy work, checkpoints may still be valuable for independently verifying the final results.
This is one reason why equipment price and project cost should not be treated as the same thing. A more expensive RTK/PPK drone may actually lower the overall cost of repeated mapping projects by reducing field labor and setup time.
Operational and Processing Costs
Once the equipment has been purchased, every project still has ongoing costs.
Common operating expenses include:
- Drone pilot and field labor
- Photogrammetry processing
- Travel and transportation
- Battery charging and replacement
- Equipment maintenance and repairs
- Data storage and backup
- Cloud processing fees
- Insurance and regulatory compliance
- Computer hardware for local processing
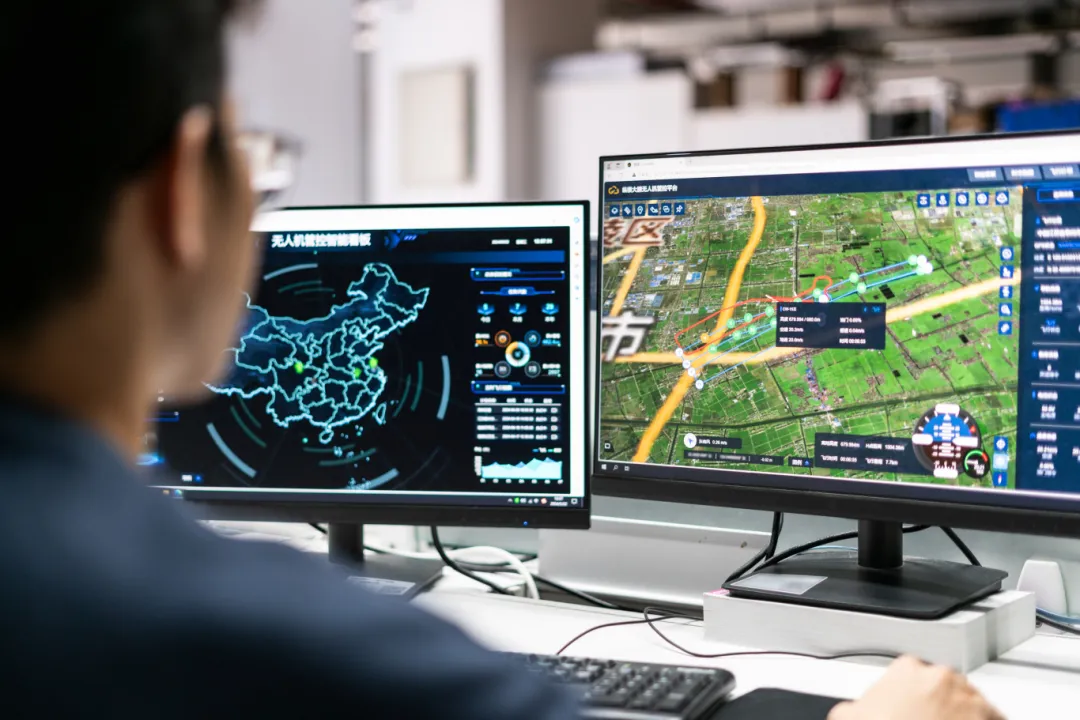
For large mapping projects, processing can become a substantial part of the budget. Thousands of high-resolution images can require significant computing power, storage, and processing time.
If you process data locally, you may need a workstation with sufficient CPU/GPU performance, RAM, and fast storage. Cloud processing reduces the hardware investment but usually introduces recurring processing or subscription costs.
What Determines the Cost of a Drone Photogrammetry Project?
The same drone can be inexpensive for one project and relatively expensive for another. Several factors have a direct impact on the final cost.
Drone Photogrammetry Flight Planning Tips
Good photogrammetry starts with good flight planning. The goal is to capture sharp, consistently exposed images with enough overlap for the software to identify the same features across multiple photos. Before takeoff, pay attention to the flight pattern, image overlap, altitude, camera settings, terrain, and weather conditions.
Choose the Right Flight Pattern
For most mapping projects, a parallel grid (lawnmower) pattern is the standard approach. The drone flies back and forth along evenly spaced lines while maintaining consistent altitude and camera angle.
- Single grid: Suitable for relatively flat, open areas and standard orthomosaic or terrain mapping.
- Double grid: Adds a second flight direction perpendicular to the first. It can improve 3D reconstruction in areas with complex terrain, weak visual features, or demanding accuracy requirements.
- Oblique flight: Useful for buildings, towers, cliffs, stockpiles, and other structures with significant vertical surfaces. Angled images capture details that nadir imagery can miss.
For a typical mapping project, a single grid is usually enough. Add crosshatch or oblique passes when the site geometry or deliverables require them.
Set Sufficient Image Overlap
Image overlap is critical for reliable image matching. As a general starting point, use 75–85% forward overlap and 60–75% sidelap. More overlap may be appropriate for steep terrain, tall structures, or areas with limited visual texture.
Higher overlap provides more matching points, but it also increases the number of images, flight time, storage requirements, and processing time. The goal is not to maximize overlap, but to use enough overlap for the camera and site conditions.
Fly at the Right Altitude
Flight altitude affects both GSD and coverage. Flying lower produces finer GSD and more detail, while flying higher covers more ground per image but reduces resolution.
Choose altitude based on the required GSD rather than using a fixed height for every project. Also consider:
- Required output accuracy and resolution
- Camera sensor and focal length
- Terrain elevation changes
- Obstacle clearance
- Local altitude restrictions
On uneven terrain, terrain-following can help maintain a more consistent GSD across the survey area. If terrain-following is unavailable, divide the site into suitable flight areas or adjust the mission altitude accordingly.
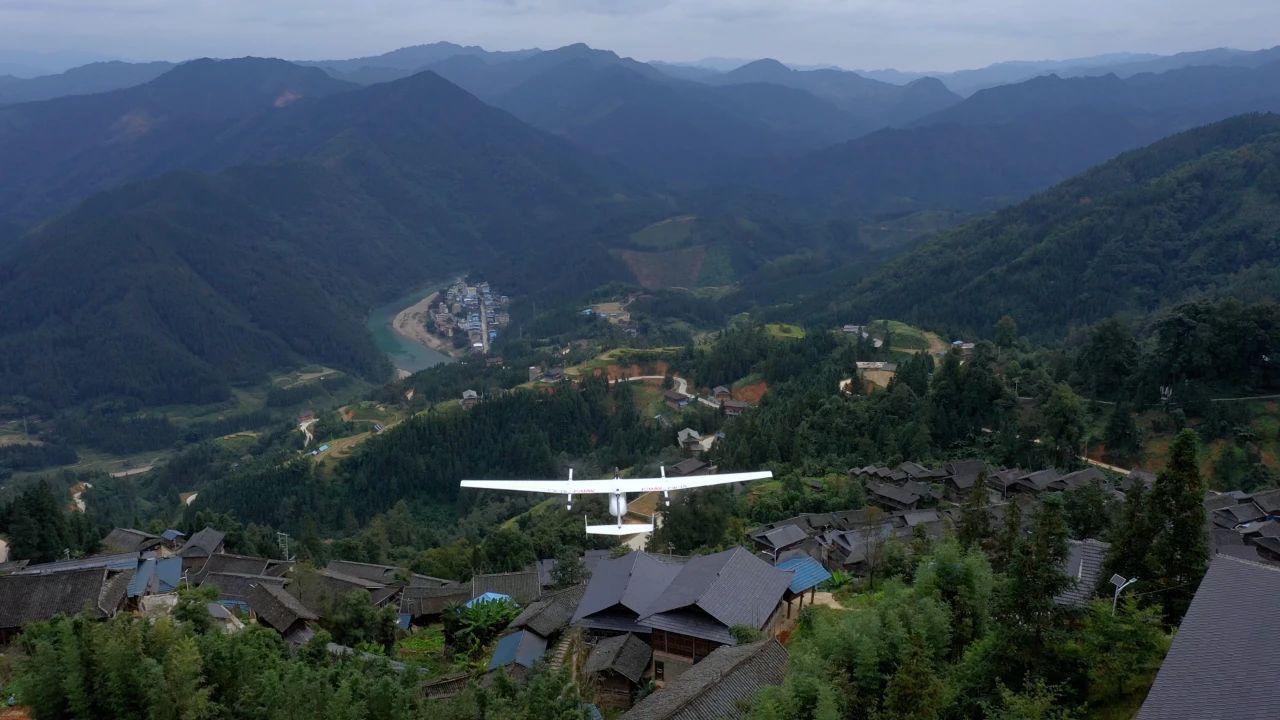
Keep Camera Settings Consistent
Consistent image quality is more important than using a particular set of camera settings. Whenever possible, use manual or locked settings throughout the mission.
- Use a fast enough shutter speed to minimize motion blur.
- Keep ISO as low as practical to reduce image noise.
- Lock white balance to avoid color shifts between images.
- Set and lock focus before takeoff.
- Use an aperture that provides good lens sharpness rather than simply choosing the widest setting.
- Avoid changing exposure settings during the mission unless lighting conditions require it.
Take a few test images before starting the survey and check for sharpness, exposure, and unwanted reflections or glare.
Match the Camera Angle to the Project
The camera angle should match the type of data you need to produce.
Nadir imagery (camera pointing straight down) is the standard choice for orthomosaics, topographic mapping, and DSM/DTM generation. It provides consistent coverage of horizontal surfaces and is relatively straightforward to process.
Oblique imagery (camera angled toward the side) is better suited to 3D reconstruction of buildings, towers, cliffs, stockpiles, and other objects with vertical or steep surfaces.
For projects that require both accurate mapping and detailed 3D models, a combination of nadir and oblique imagery can provide better coverage than either approach alone.
Consider Terrain and Ground Conditions
Terrain can significantly affect image quality and reconstruction. Steep slopes, vegetation, repetitive surfaces, and areas with little visual texture are more challenging for photogrammetry.
Before planning the mission, identify:
- Significant elevation changes
- Tall buildings, trees, or other obstacles
- Vegetated or moving areas
- Water, snow, sand, or other low-texture surfaces
- Areas likely to contain strong shadows or reflections
For complex sites, increasing overlap, using terrain-following, or adding oblique imagery can improve reconstruction reliability.
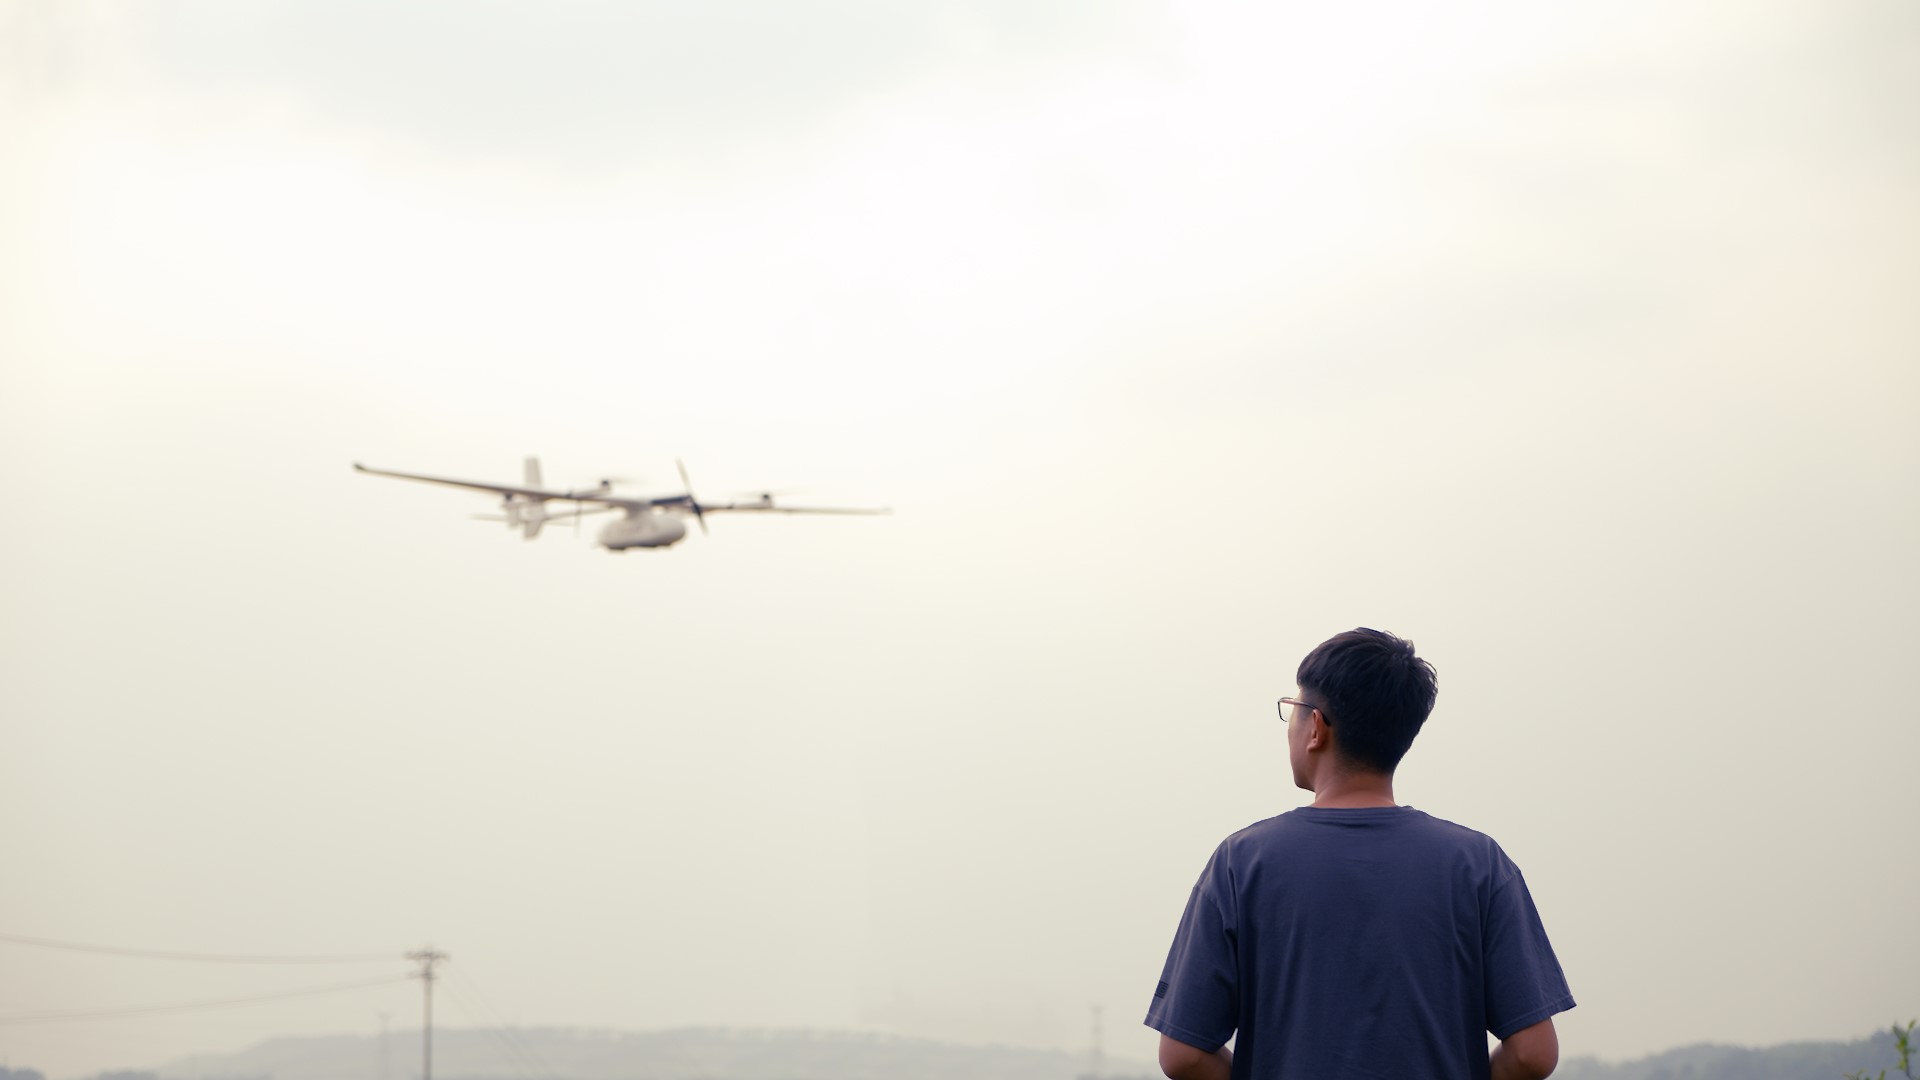
Choose Suitable Weather and Lighting
Stable lighting and weather conditions make photogrammetry easier to process. Soft, diffuse light, such as light overcast conditions, often produces more consistent images than harsh direct sunlight.
Avoid flying when:
- Strong shadows move rapidly across the site
- Glare or reflections are prominent
- Wind causes excessive drone movement or image blur
- Rain, fog, or low visibility affects image quality
- Vegetation or other objects are moving significantly
The exact wind limit depends on the drone and camera system. Instead of relying on a universal wind-speed threshold, make sure the aircraft can maintain stable flight and the camera can capture sharp images at the planned flight speed.
Check the Mission Before Takeoff
A short pre-flight check can prevent an entire survey from having to be repeated. Confirm that:
- The AOI and flight boundary cover the entire project area.
- The planned altitude provides the required GSD.
- Forward and side overlap are sufficient.
- The camera is focused and settings are locked.
- The battery capacity is sufficient for the mission.
- The planned route provides adequate obstacle clearance.
- Weather and lighting conditions are suitable.
- Local airspace and flight restrictions have been checked.
For larger projects, it is also worth reviewing the first few images before completing the entire mission. Catching poor focus, excessive motion blur, or incorrect exposure early can save hours of rework.
A well-planned mission does not necessarily mean using the highest overlap, lowest altitude, or most complicated flight pattern. The best settings are those that provide enough image quality and coverage for the project's accuracy requirements without creating unnecessary flight and processing costs.
Real-World Drone Photogrammetry Example
A real-world project helps show how flight planning, camera selection, positioning, and photogrammetric processing work together. One example comes from a large-scale urban mapping project in Thailand, where drone imagery was used to update geospatial data for three cities.
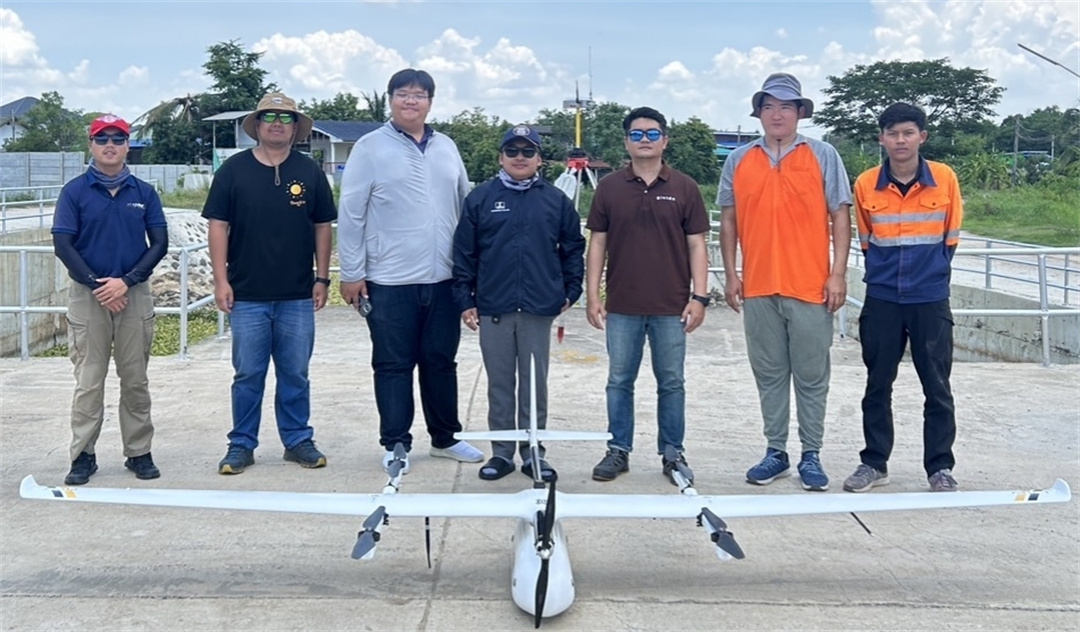
Thailand Urban Mapping with UAV Photogrammetry
Thailand's Geo-Informatics and Space Technology Development Agency (GISTDA) needed updated mapping data for Khon Kaen, Nakhon Ratchasima, and Nakhon Si Thammarat. The existing maps could no longer keep pace with urban development, making accurate and up-to-date aerial data important for planning and infrastructure management.
The project was carried out by Systronics Co., Ltd., which selected a JOUAV CW-15 VTOL drone equipped with a CA502R oblique camera and RTK/PPK positioning.
The combination was well suited to a large urban survey. The CW-15 provided efficient coverage over large areas, while the oblique camera captured buildings and other vertical features from multiple angles. This is particularly useful in urban environments, where nadir-only imagery can leave building façades and other vertical surfaces poorly represented.
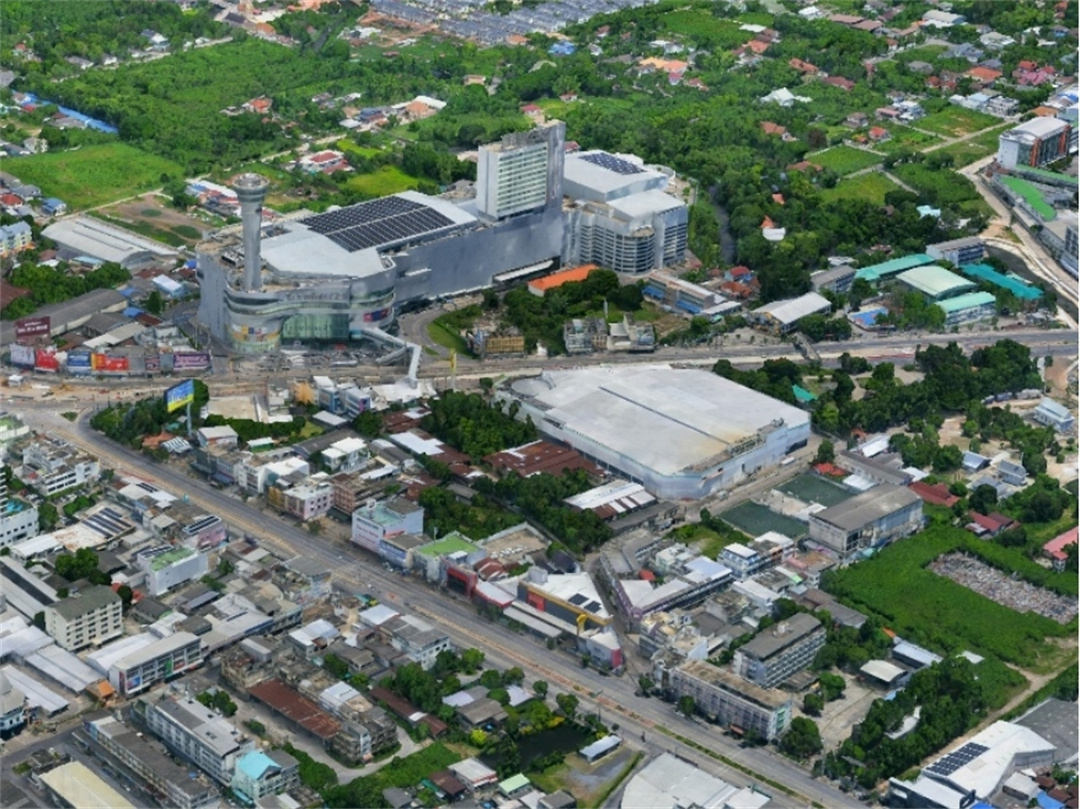
From Flight Planning to 3D Mapping
The project followed a typical professional photogrammetry workflow:
- Flight planning: The survey area and mission parameters were defined before the flights, including altitude, GSD, image overlap, and flight routes.
- Ground control and positioning: GNSS-surveyed ground control points and checkpoints were used alongside RTK/PPK positioning to establish accurate image coordinates and independently verify the results.
- Image acquisition: The CW-15 collected overlapping nadir and oblique images across the three urban areas.
- Photogrammetric processing: The imagery was processed into orthophotos, digital terrain and surface models, point clouds, and textured 3D models.
- Accuracy verification: The final datasets were checked against the project's accuracy requirements before being delivered for further geospatial applications.
The project demonstrates why image acquisition cannot be separated from the rest of the photogrammetry workflow. High-quality results depend not only on the drone and camera, but also on appropriate overlap, accurate positioning, ground control, and a flight pattern that matches the final deliverables.
Project at a Glance
Read More
Here’s the question every drone pilot hears: How much should I charge?
And here’s the honest answer: $100 to $500 an hour, or $300 to $5,000 per project, depending on what you’re doi
Here’s something most people don’t think about: someone has to climb those cell towers you see along the highway.
Tower climbers ascend hundreds of feet—often in wind, heat, and hazardous

JOUAV Product News and Use Cases
Fixed-Wing VTOL Drones Insights and Industry Trends
Invitations to online demo events
Read More
Picking drone mapping software feels harder than it should be.
Open any review site, and you will see the same ten names repeated: Pix4D, DroneDeploy, DJI Terra, Agisoft Metashape, UgCS. But the recom
Here’s the question every drone pilot hears: How much should I charge?
And here’s the honest answer: $100 to $500 an hour, or $300 to $5,000 per project, depending on what you’re doi
Here’s something most people don’t think about: someone has to climb those cell towers you see along the highway.
Tower climbers ascend hundreds of feet—often in wind, heat, and hazardous
JOUAV Product News and Use Cases
Fixed-Wing VTOL Drones Insights and Industry Trends
Invitations to online demo events
Read More
Picking drone mapping software feels harder than it should be.
Open any review site, and you will see the same ten names repeated: Pix4D, DroneDeploy, DJI Terra, Agisoft Metashape, UgCS. But the recom
Here’s the question every drone pilot hears: How much should I charge?
And here’s the honest answer: $100 to $500 an hour, or $300 to $5,000 per project, depending on what you’re doi
Here’s something most people don’t think about: someone has to climb those cell towers you see along the highway.
Tower climbers ascend hundreds of feet—often in wind, heat, and hazardous
JOUAV Product News and Use Cases
Fixed-Wing VTOL Drones Insights and Industry Trends
Invitations to online demo events
 English
 中文
中文