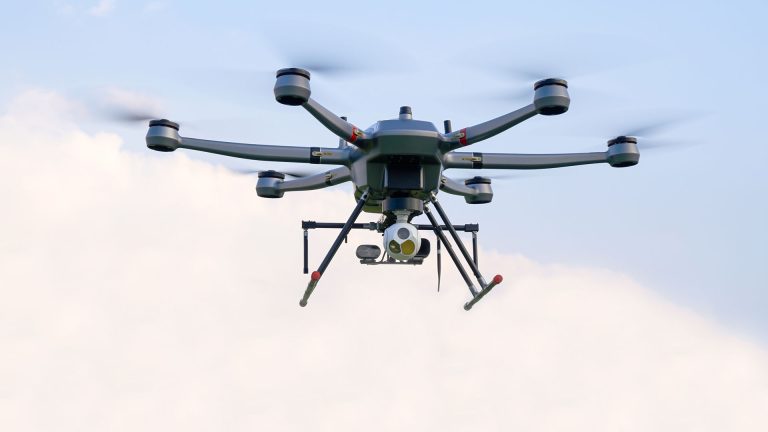
Have you ever watched a drone hover effortlessly over a construction site, inspect a wind turbine blade, or deliver medical supplies to a remote village?
That drone was almost certainly a multirotor.
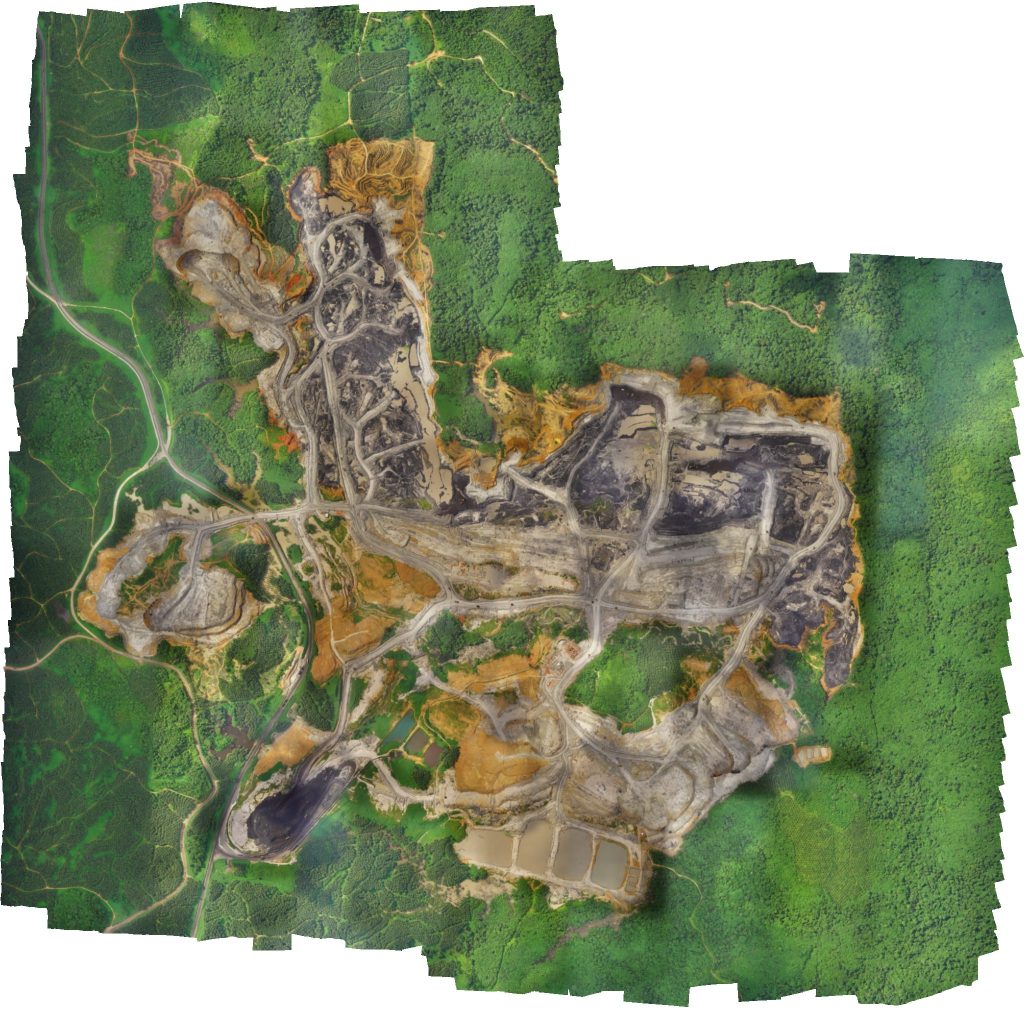
What is an Orthomosaic?
An orthomosaic is like a super-accurate aerial puzzle. It's a detailed, georeferenced image of a place, created by piecing together high-res photos taken from drones or other aerial platforms. This process, called orthomosaic mapping, uses special software and photogrammetry to make sure all the images fit together perfectly, even if the ground isn't flat.
Now, there are two main types: 2D and 3D orthomosaics.
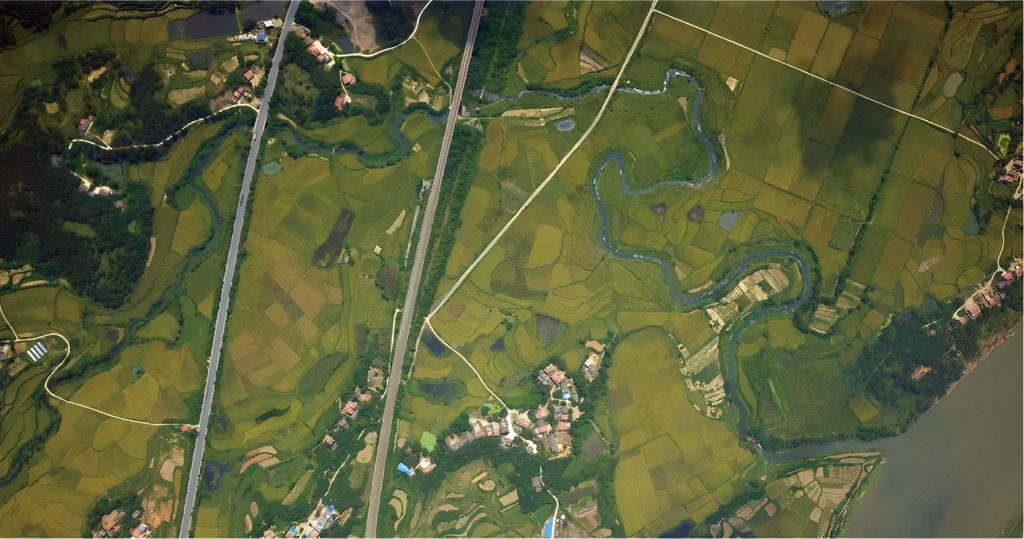
- 2D Orthomosaic: Think of it as a super sharp, top-down picture. It's great for things like farming or city planning because it's like having an incredibly detailed map with exact coordinates.
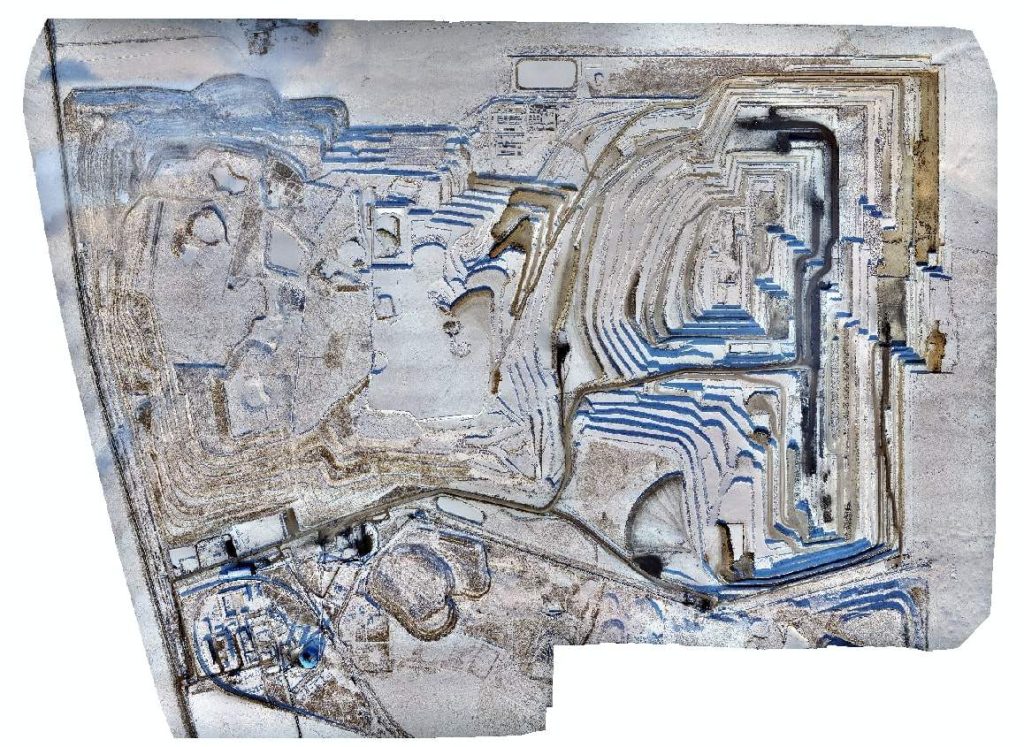
- 3D Orthomosaic: This one's like a 2D orthomosaic but with an extra dimension - height. It's perfect for stuff like construction or forestry because it gives you both horizontal and vertical info, helping you understand the lay of the land in three dimensions.
Drone Orthomosaic Maps are Detailed, Accurate, and Current
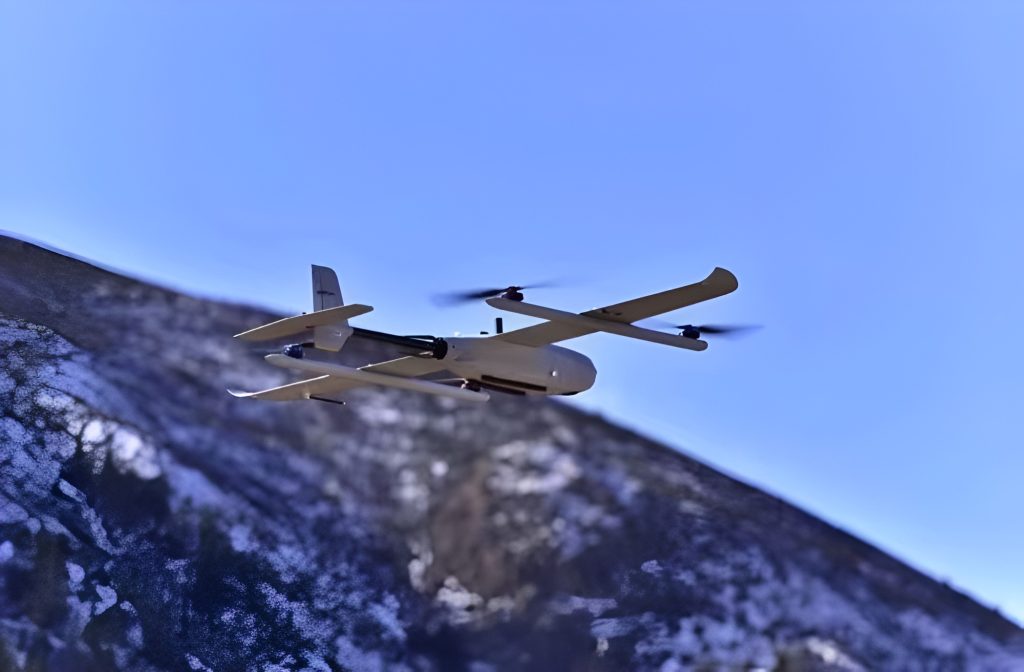
Many companies often use outdated satellite imagery from sources like Google Maps for site analysis, but the infrequent updates limit their usefulness. Now, consider the benefits of having live, centimeter-resolution satellite images available worldwide. Drones like the CW-007 VTOL, with its impressive 90-minute flight time and down to 1cm absolute horizontal accuracy, offer a practical alternative.
These drones capture aerial photos, which are then corrected through orthorectification, making them compatible with Geographical Information Systems. These images can serve as a solid foundation for terrain linework and can be seamlessly integrated into CAD software for precise analysis and planning, offering a valuable resource for project assessment and decision-making.
How Do You Make an Orthomosaic Map Using a Drone?
Creating an orthomosaic map using a drone involves a systematic process that combines aerial photography, data collection, and post-processing. Here are the key steps:
Step 1 - Flight Planning and Preparation
- Determine Your Mapping Area: Identify the geographic area you want to map using the orthomosaic technique. Have a clear understanding of the boundaries and features you wish to capture.
- Check Local Regulations: Before flying your drone, ensure you're aware of and compliant with local drone regulations and airspace restrictions. Obtain any necessary permits or permissions if required.
- Choose the Right Drone and Camera: Select a drone equipped with a suitable camera for capturing high-resolution aerial images. Ensure the camera settings are optimized for the conditions of your mapping area.
- Calibrate and Test Your Equipment: Before the flight, calibrate your drone's sensors, compass, and GPS to ensure accurate positioning and data collection. Test the camera and drone systems to verify functionality.
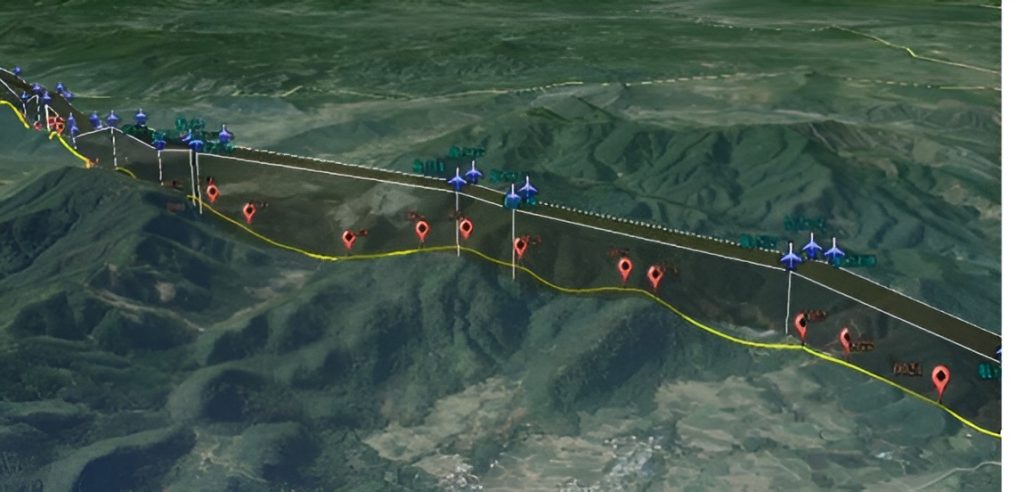
Step 2 - Flight Path Planning
- Define the Flight Path: Plan the flight path that your drone will follow to capture images. Consider using a grid or pattern to ensure sufficient image overlap for accurate stitching. The flight path should cover the entire mapping area.
- Set Altitude and Overlap: Determine the ideal flight altitude above ground level (AGL) based on your desired map resolution. Higher altitudes cover more area but may sacrifice detail. Configure front and side overlap percentages to ensure adequate image overlap.
- Flight Speed: Set an appropriate flight speed to balance data collection efficiency with image quality. Adjust flight direction if necessary to optimize coverage and minimize flight time.
Step 3 - Pre-Flight Checklist
- Check Weather Conditions: Ensure that weather conditions are suitable for your drone flight. Avoid flying in strong winds, rain, or low visibility conditions.
- Safety Check: Inspect your drone for any physical damage or issues. Verify that the propellers, motors, and battery are in good condition.
- Battery and Power: Charge your drone's batteries fully. Carry spare batteries if needed, considering the flight duration required for your mapping area.
Step 4 - Executing the Flight
- Launch and Follow the Flight Path: Launch your drone from a safe and open location. Monitor the flight as it follows the predefined path, capturing images at the specified intervals.
- Real-Time Monitoring: If your drone and software support it, use real-time monitoring to assess image quality and coverage during the flight.
Step 5 - Post-Flight Data Processing
- Image Transfer: After completing the flight, transfer the captured images from the drone's memory to your computer.
- Georeferencing: Georeference the images by assigning GPS coordinates to each image. This step ensures that the images align accurately with the Earth's surface.
- Photogrammetry: Use specialized photogrammetry software to process the images. The software will identify common features and create a 3D point cloud to generate an initial map.
- Orthorectification: Orthorectify the map to correct for distortions caused by terrain and the drone's angle during flight. This process makes the map geometrically accurate.
Step 6 - Map Generation and Analysis
- Map Stitching: The software stitches together the orthorectified images to create a seamless orthomosaic map.
- Quality Control: Review the generated orthomosaic map for quality and accuracy. Check for any artifacts, distortions, or gaps that may require correction.
- Data Extraction: Extract relevant data from the orthomosaic map, such as measurements, areas, or features of interest. Utilize this data for your specific application or analysis.
Key Factor Affecting Drone Orthomosaic Accuracy
Creating precise orthomosaic maps from drone imagery is essential for various applications. Achieving accuracy depends on several key factors:
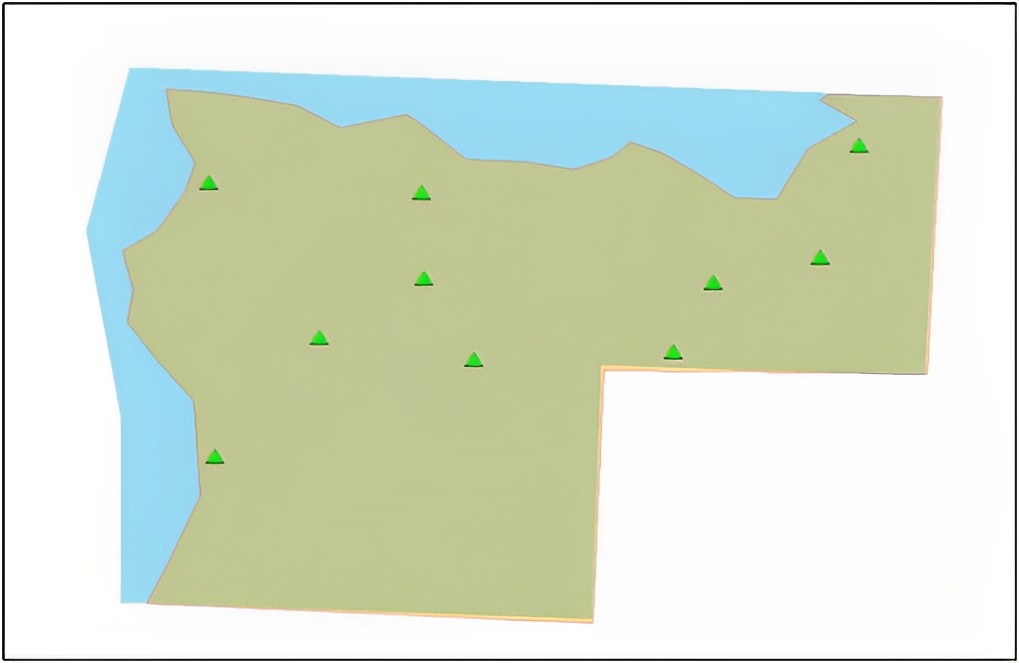
Ground Control Points (GCP)
The number of ground control points (GCPs) required depends on the size and complexity of the mapping area. For small to medium-sized projects, a minimum of three GCPs is recommended. However, larger or more intricate terrains may benefit from additional GCPs.
A good rule of thumb is to place one GCP in each corner of the mapping area and distribute others evenly throughout. Properly surveyed and accurately marked GCPs serve as anchor points, allowing the software to georeference the orthomosaic map precisely.
Drone Calibration and Sensor Accuracy
Ensuring the accuracy of your drone's sensors, such as GPS and IMU, is critical for orthomosaic mapping. Calibrate your drone's sensors regularly, following the manufacturer's guidelines. Calibration should occur when transitioning between different flight locations, altitudes, or significant changes in environmental conditions. By keeping your drone's sensors finely tuned, you minimize the potential for errors that could compromise the orthomosaic's accuracy.
Image Overlap and Coverage
Image overlap and coverage are vital factors for successful drone orthomosaic mapping. For general mapping purposes, maintain a minimum of 75% frontal and 60% side overlap to ensure accurate stitching and georeferencing. For precision agriculture, aim for at least 80% overlap in both directions for improved vegetation health assessments. In dense vegetation like forests, use a minimum of 85% overlap in both directions to capture intricate details and tackle challenging terrain.
Environmental Factors
Environmental conditions, such as wind, lighting, and weather, can significantly impact the quality of drone imagery. To mitigate these factors, it's advisable to schedule flights during periods of calm weather with minimal wind. Favorable lighting conditions, such as early morning or late afternoon when shadows are less pronounced, enhance image quality. Avoid flying in adverse weather conditions, as precipitation, fog, or extreme heat can disrupt data collection and lead to inaccuracies.
Software and Processing
Selecting the right orthomosaic mapping software and understanding its capabilities are pivotal. Opt for professional-grade photogrammetry software that can automatically correct distortions and precisely align images. Stay updated with software releases to access the latest advancements. Ensure your processing workflow adheres to best practices, and consider consulting experts or resources to enhance your proficiency.
What is Orthomosaic Map Used for?
Now that we've uncovered what an orthomosaic is and how it's made, it's time to explore the exciting realm of its applications.
Precision Agriculture
Orthomosaic maps are pivotal in modern agriculture. Farmers and agronomists employ these maps for crop health assessment, yield prediction, and precision farming practices. The detailed 2D orthomosaic maps assist in identifying areas requiring specific treatments, such as irrigation or fertilization, leading to optimized resource allocation and increased crop productivity.
Construction and Engineering
The construction industry relies on orthomosaic mapping services for various purposes. These maps facilitate site selection by providing a comprehensive view of terrain and infrastructure. During construction, they monitor progress and ensure alignment with initial plans. The 3D orthomosaic images enable engineers to assess volumetric changes and detect potential issues, enhancing project management.
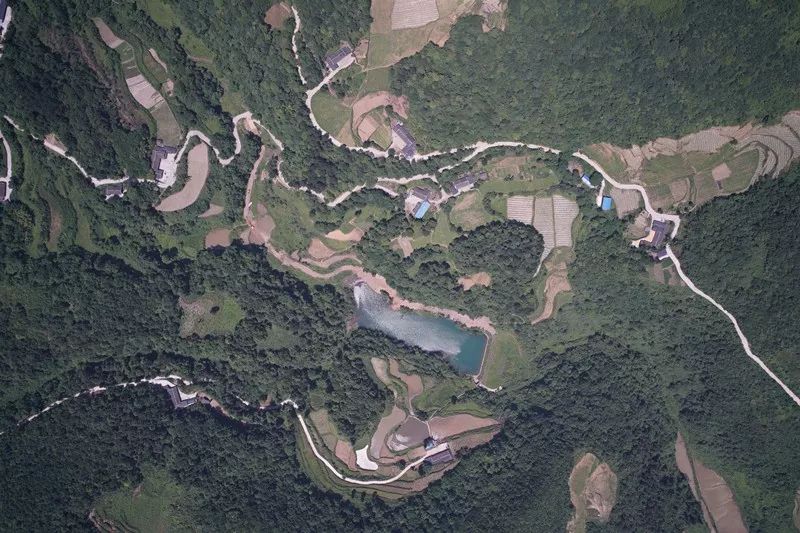
Environmental Monitoring
Conservationists and environmental agencies employ orthomosaic maps to monitor and manage natural ecosystems. These maps help track deforestation, assess habitat changes, and study wildlife populations. Orthomosaic mapping contributes to informed decision-making regarding ecosystem preservation and restoration efforts.
Urban Planning and Development
Urban planners use orthomosaic mapping to create detailed 2D orthomosaic maps of cities and urban areas. These maps aid in land-use planning, infrastructure development, and disaster management. They provide crucial insights into population distribution, traffic patterns, and infrastructure networks.
Archaeology and Cultural Heritage Preservation
Archaeologists utilize orthomosaic maps to discover and document historical and archaeological sites. These maps offer non-invasive insights into hidden structures and ancient landscapes, contributing to cultural heritage preservation and historical research.
Mining and Natural Resource Management
The mining industry leverages orthomosaic maps for land assessment, mineral exploration, and environmental impact assessments. These maps assist in optimizing resource extraction while minimizing ecological disruption and adhering to regulatory requirements.
Emergency Response and Disaster Management
During natural disasters and emergencies, orthomosaic maps play a vital role in damage assessment and emergency response planning. These maps help identify affected areas, assess the extent of damage, and plan efficient relief operations.
Land Surveying and Mapping
Surveyors use orthomosaic mapping as a foundation for highly accurate base maps for land surveys. These maps aid in property boundary determination, land development projects, and infrastructure planning.
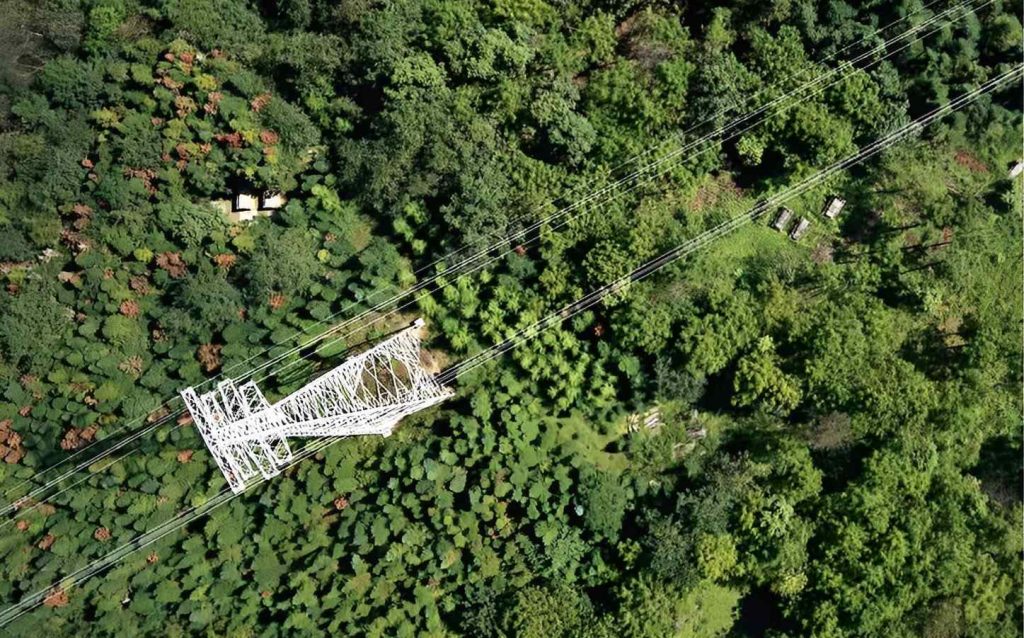
Infrastructure Inspection and Maintenance
Utility companies and transportation agencies employ drone orthomosaic maps to inspect critical infrastructure elements like power lines, pipelines, and roadways. These maps enable the early detection of issues, reducing downtime and ensuring the safety and reliability of infrastructure networks.
FAQ
What is an Orthophoto?
An orthophoto, also known as an orthophotograph, orthoimage, or orthoimagery, is a georeferenced aerial photograph that has undergone a process of geometric correction to remove distortion and achieve a uniform scale. This correction process rectifies the image, essentially "flattening" it so that it accurately represents the Earth's surface as if viewed from directly above.
What is the Difference Between Orthophoto and True Orthophoto?
Both orthophotos and true orthophotos are essentially aerial images that have been corrected for distortions caused by the camera angle and terrain. However, there's a key difference in how they handle elevation:
Orthophoto: This is the more general term. A regular orthophoto is corrected using a Digital Terrain Model (DTM) which represents the bare earth, excluding any buildings or vegetation. This means that while the image is flattened and more geographically accurate than a raw aerial photo, tall objects like buildings may appear slightly tilted away from the center.
True Orthophoto: This takes things a step further. A true orthophoto is created using a Digital Surface Model (DSM) which incorporates the elevation of all objects on the ground, including buildings and trees. This results in a completely vertical view where everything appears straight up and down, as if looking directly down from above.

In essence, a true orthophoto provides a more accurate and realistic representation of the landscape, particularly in areas with dense development or significant vegetation.
What is the Difference Between Orthophoto and Orthomosaic?
An orthophoto is a single image that has been geometrically corrected, or orthorectified so that the scale is uniform. An orthomosaic is a composite image created by stitching together multiple overlapping orthophotos. The result is a seamless, high-resolution representation of a specific area.
Orthophotos are a combination of a vertical aerial photograph and a topographical map. They have a larger scale than topographic maps, which allows for more detail. Orthomosaics are similar to Google Earth but with higher resolution. They can produce surveyor-grade measurements of topography, infrastructure, and buildings.
What is the Difference Between Mosaic and Orthomosaic?
The primary difference between a mosaic and an orthomosaic lies in their level of geometric correction and accuracy. A mosaic is a composite image created by combining multiple photos, often without significant correction, and is mainly used for visual purposes.
In contrast, an orthomosaic is a highly accurate composite image created by stitching together corrected aerial images, making it suitable for precise measurements, mapping, and geospatial analysis.
What is Orthorectification?
Orthorectification is a critical image processing technique used in remote sensing and geospatial analysis to correct for distortions and variations in scale that occur in aerial or satellite images. The primary goal of orthorectification is to transform an image into a format that accurately represents the Earth's surface, allowing for precise measurements and mapping.
How Does Orthomosaic Stitching Work?
Orthomosaic stitching combines overlapping aerial images to create a seamless, georeferenced mosaic. The process involves:
- Image Capture: The process begins with the capture of a series of overlapping aerial images of the target area using a drone, aircraft, or satellite. These images are captured from various positions and angles to ensure complete coverage and overlap between adjacent images.
- Preprocessing: Before stitching, the individual images undergo preprocessing steps to prepare them for alignment and merging. This preprocessing may include adjustments for exposure, contrast, and color balance to ensure uniformity across all images.
- Feature Matching: In the stitching process, the software identifies common features or points in adjacent images. These features can include distinct landmarks, corners of buildings, or natural features like trees or rocks. Matching these features helps align the images correctly.
- Bundle Adjustment: Once feature matching is complete, a bundle adjustment is performed. This step refines the alignment by optimizing the position and orientation of each image in the mosaic. Bundle adjustment minimizes geometric discrepancies between images and ensures accurate merging.
- Orthorectification: Before the images can be merged into an orthomosaic, they must be orthorectified individually. Orthorectification corrects for distortions caused by factors like terrain relief, camera tilt, and lens distortion. Ground control points (GCPs) and digital elevation models (DEMs) are often used to achieve precise geometric correction.
- Image Stitching: With the images orthorectified and aligned, they are stitched together using specialized software. The software merges the images based on the identified common features, ensuring a seamless transition between adjacent images.
- Georeferencing: To create a georeferenced orthomosaic, the stitching software aligns the mosaic with a known coordinate system, such as latitude and longitude. This allows each pixel in the mosaic to correspond to a specific real-world location on the Earth's surface.
- Mosaic Generation: The final step is the generation of the orthomosaic. The software blends the individual images to create a continuous, distortion-free, and accurately scaled representation of the target area.
- Quality Control: After the orthomosaic is generated, quality control checks are performed to ensure that there are no visible artifacts or errors in the mosaic. Any issues are addressed, and adjustments are made as needed.
What Programs Open Orthomosaic TIFF?
Orthomosaic TIFF files can be opened and viewed using a variety of software programs. These programs range from specialized geospatial software to more general-purpose image viewers, such as ArcGIS, ENVI, Adobe Photoshop, Pix4D, etc.
How Many Images for Orthomosaic?
The number of images required to create an orthomosaic can vary widely depending on several factors, including the size of the area, the desired resolution of the orthomosaic, the camera and drone equipment being used, and the overlap between images. Here's a general guideline for the number of images needed:
- Small Area with Low-Resolution Orthomosaic:For a small area like a residential property or a small construction site, where a relatively low-resolution orthomosaic is sufficient, you might need anywhere from 50 to 200 images. The exact number will depend on the specific circumstances.
- Medium-Sized Area with Higher Resolution: If you're working with a medium-sized area, such as a larger agricultural field or a more extensive construction site, and you require higher resolution in your orthomosaic, you could need between 200 to 500 images or even more. Again, the actual number will depend on the details of your project.
- Very Large Area with High Resolution: For very large areas, like extensive agricultural fields, large mining sites, or large-scale land mapping, it's not uncommon to use thousands of images. In such cases, using a large number of images ensures complete coverage and allows for the creation of high-resolution orthomosaics.
What is a Georeferenced Orthomosaic?
A georeferenced orthomosaic, also known simply as a georeferenced orthoimage or georeferenced orthophoto, is a specialized type of orthomosaic that is precisely aligned with a known geographic coordinate system, such as latitude and longitude. This alignment ensures that every pixel in the orthomosaic corresponds to a specific real-world location on the Earth's surface.
Read More
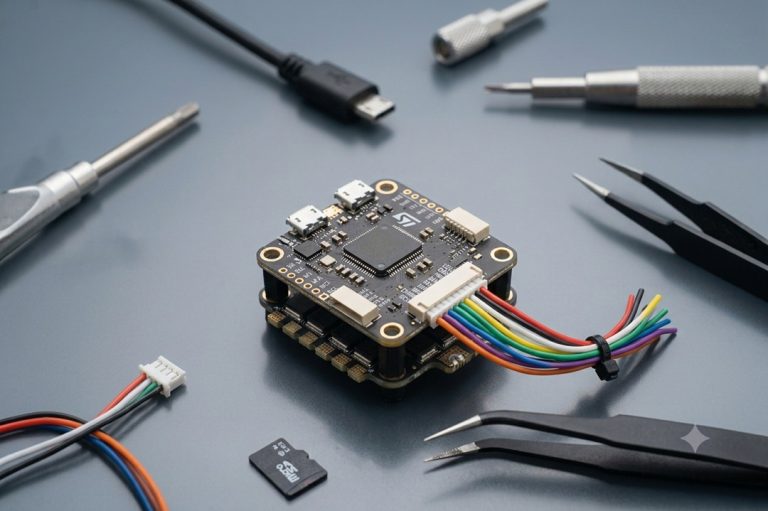
Every drone needs a brain.
Without it, you’re holding an expensive paperweight with spinning blades.
That brain is called a flight controller—but most people have no idea what it actually does.
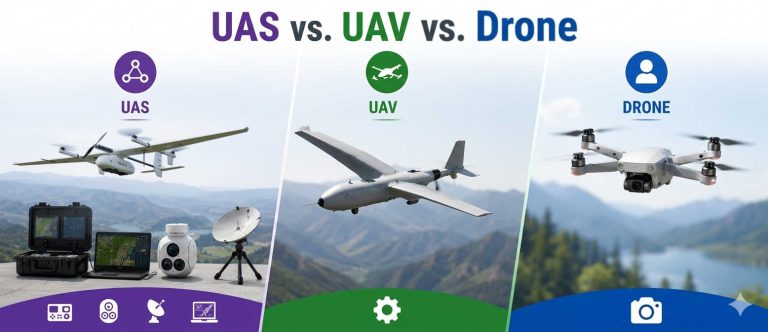
Let’s be honest: the drone world loves its acronyms. UAV, UAS, drone, RPAS, UCAV, FPV–it’s an alphabet soup. And most people use them like they’re the same thing.
They’re not.
And here’s why that matt

JOUAV Product News and Use Cases
Fixed-Wing VTOL Drones Insights and Industry Trends
Invitations to online demo events